WhatsApp Integration Guide
This comprehensive guide covers two essential processes:- Setting up WhatsApp Business in Meta Business Suite
- Integrating your WhatsApp Business account with Breezeflow
Part 1: Setting Up WhatsApp Business in Meta Business Suite
Prerequisites
Before starting, ensure you have:- An existing WhatsApp Business account (create one via WhatsApp Business App if needed)
- Admin access to Meta Business Suite
- A stable internet connection
Step-by-Step Setup Process
1. Access Meta Business Suite
- Visit Meta Business Suite
- Log in with your Facebook business credentials
- Navigate to Inbox in the left-side menu
Note: WhatsApp messages won’t appear until account linking is complete
Step 2: Locating WhatsApp in Meta Business Suite
Select the Right Business
- From the left-side menu, choose your business account.
Locate WhatsApp Account
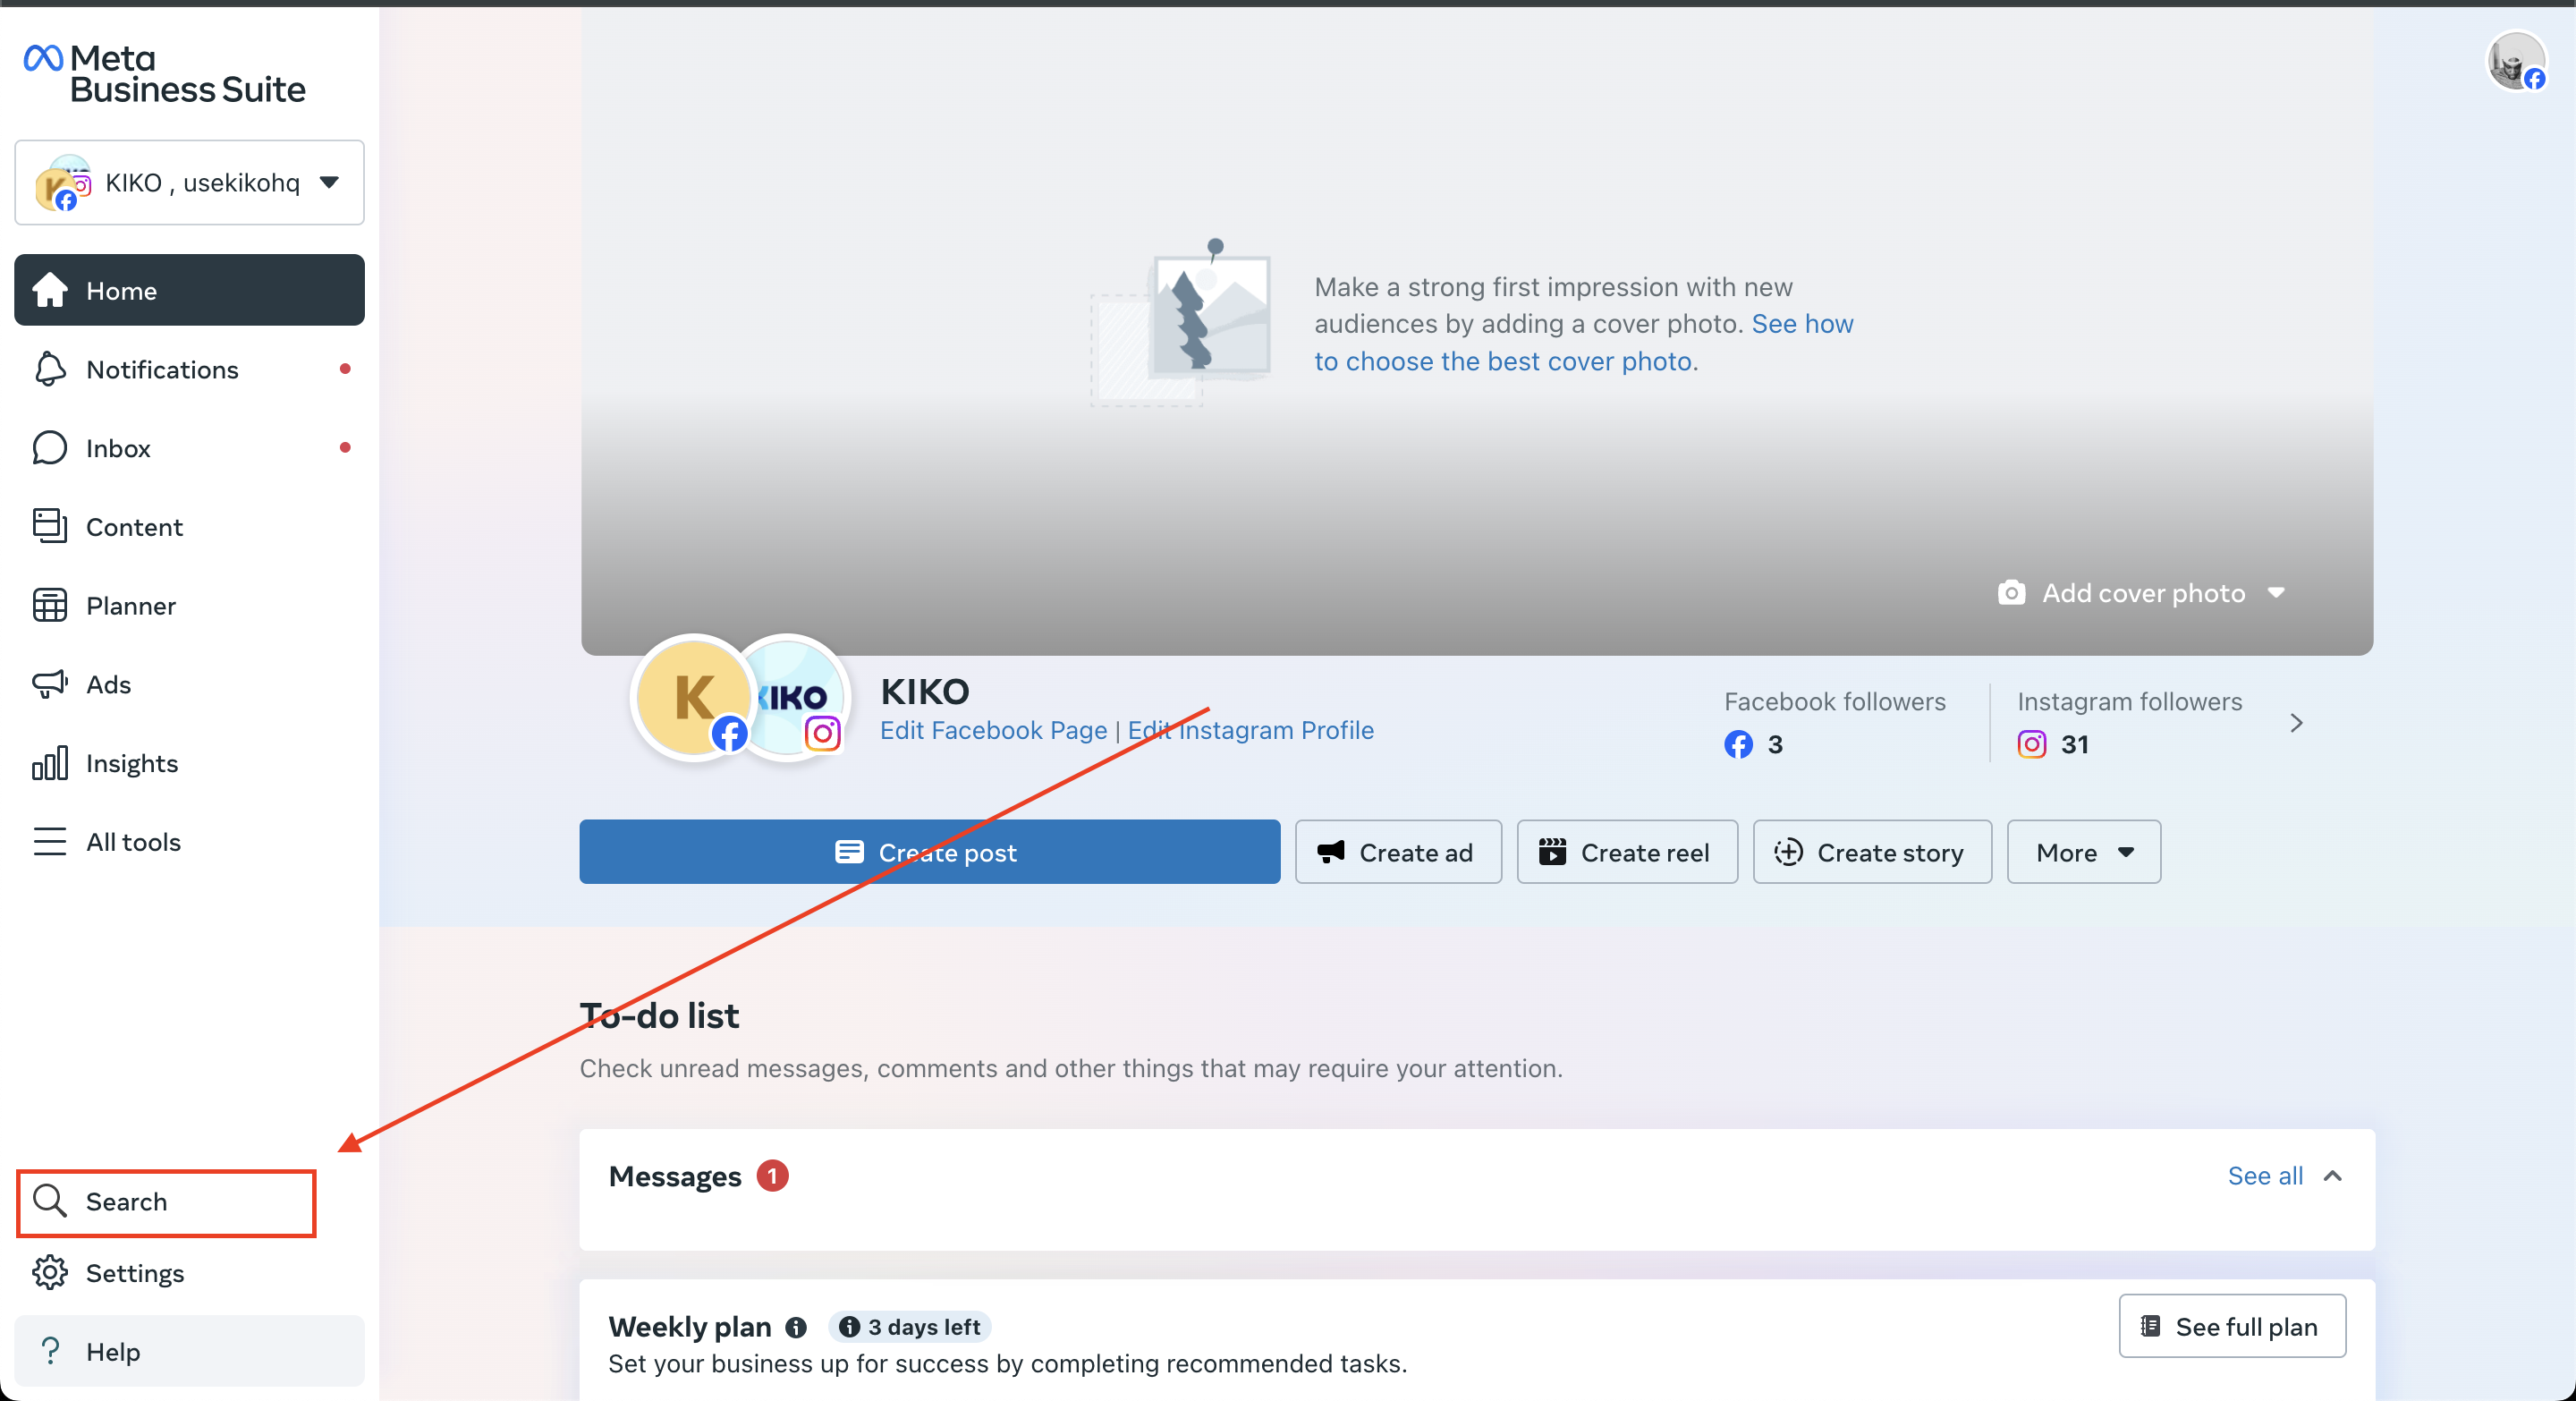
You have two options to locate the WhatsApp account:Option 1: Search
- Scroll down and click on Search.
- In the search bar, type
WhatsApp. - From the search results, select WhatsApp Account.
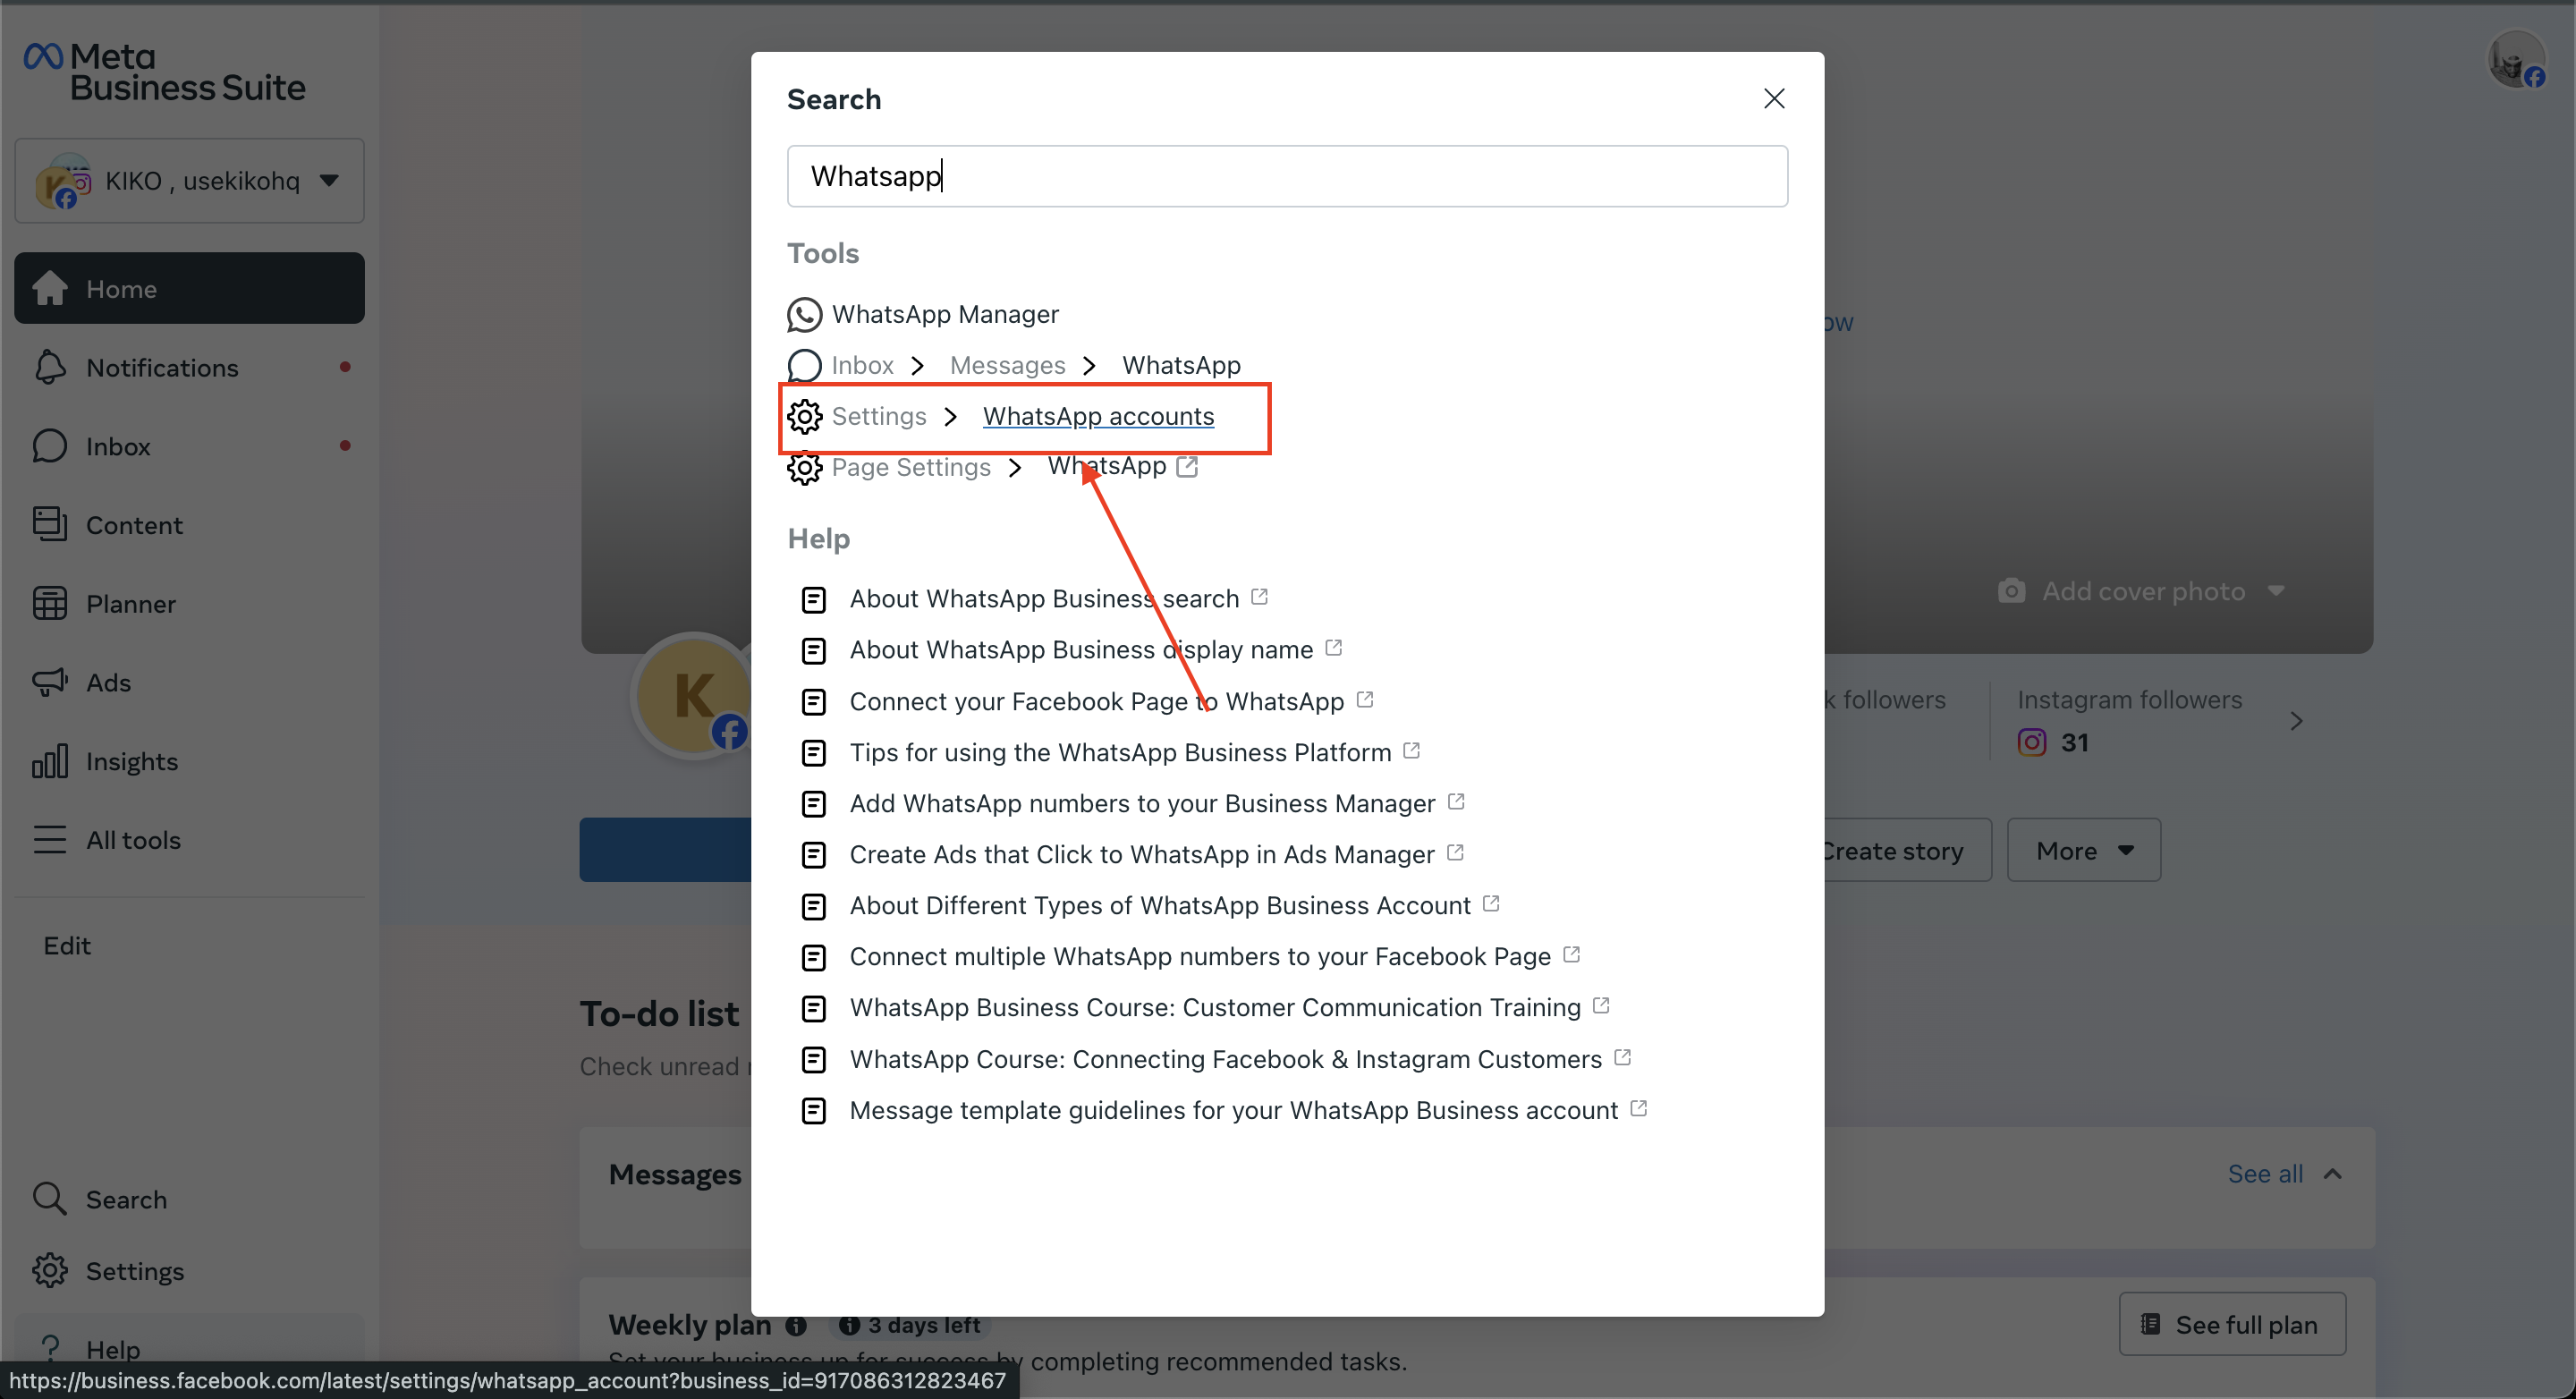
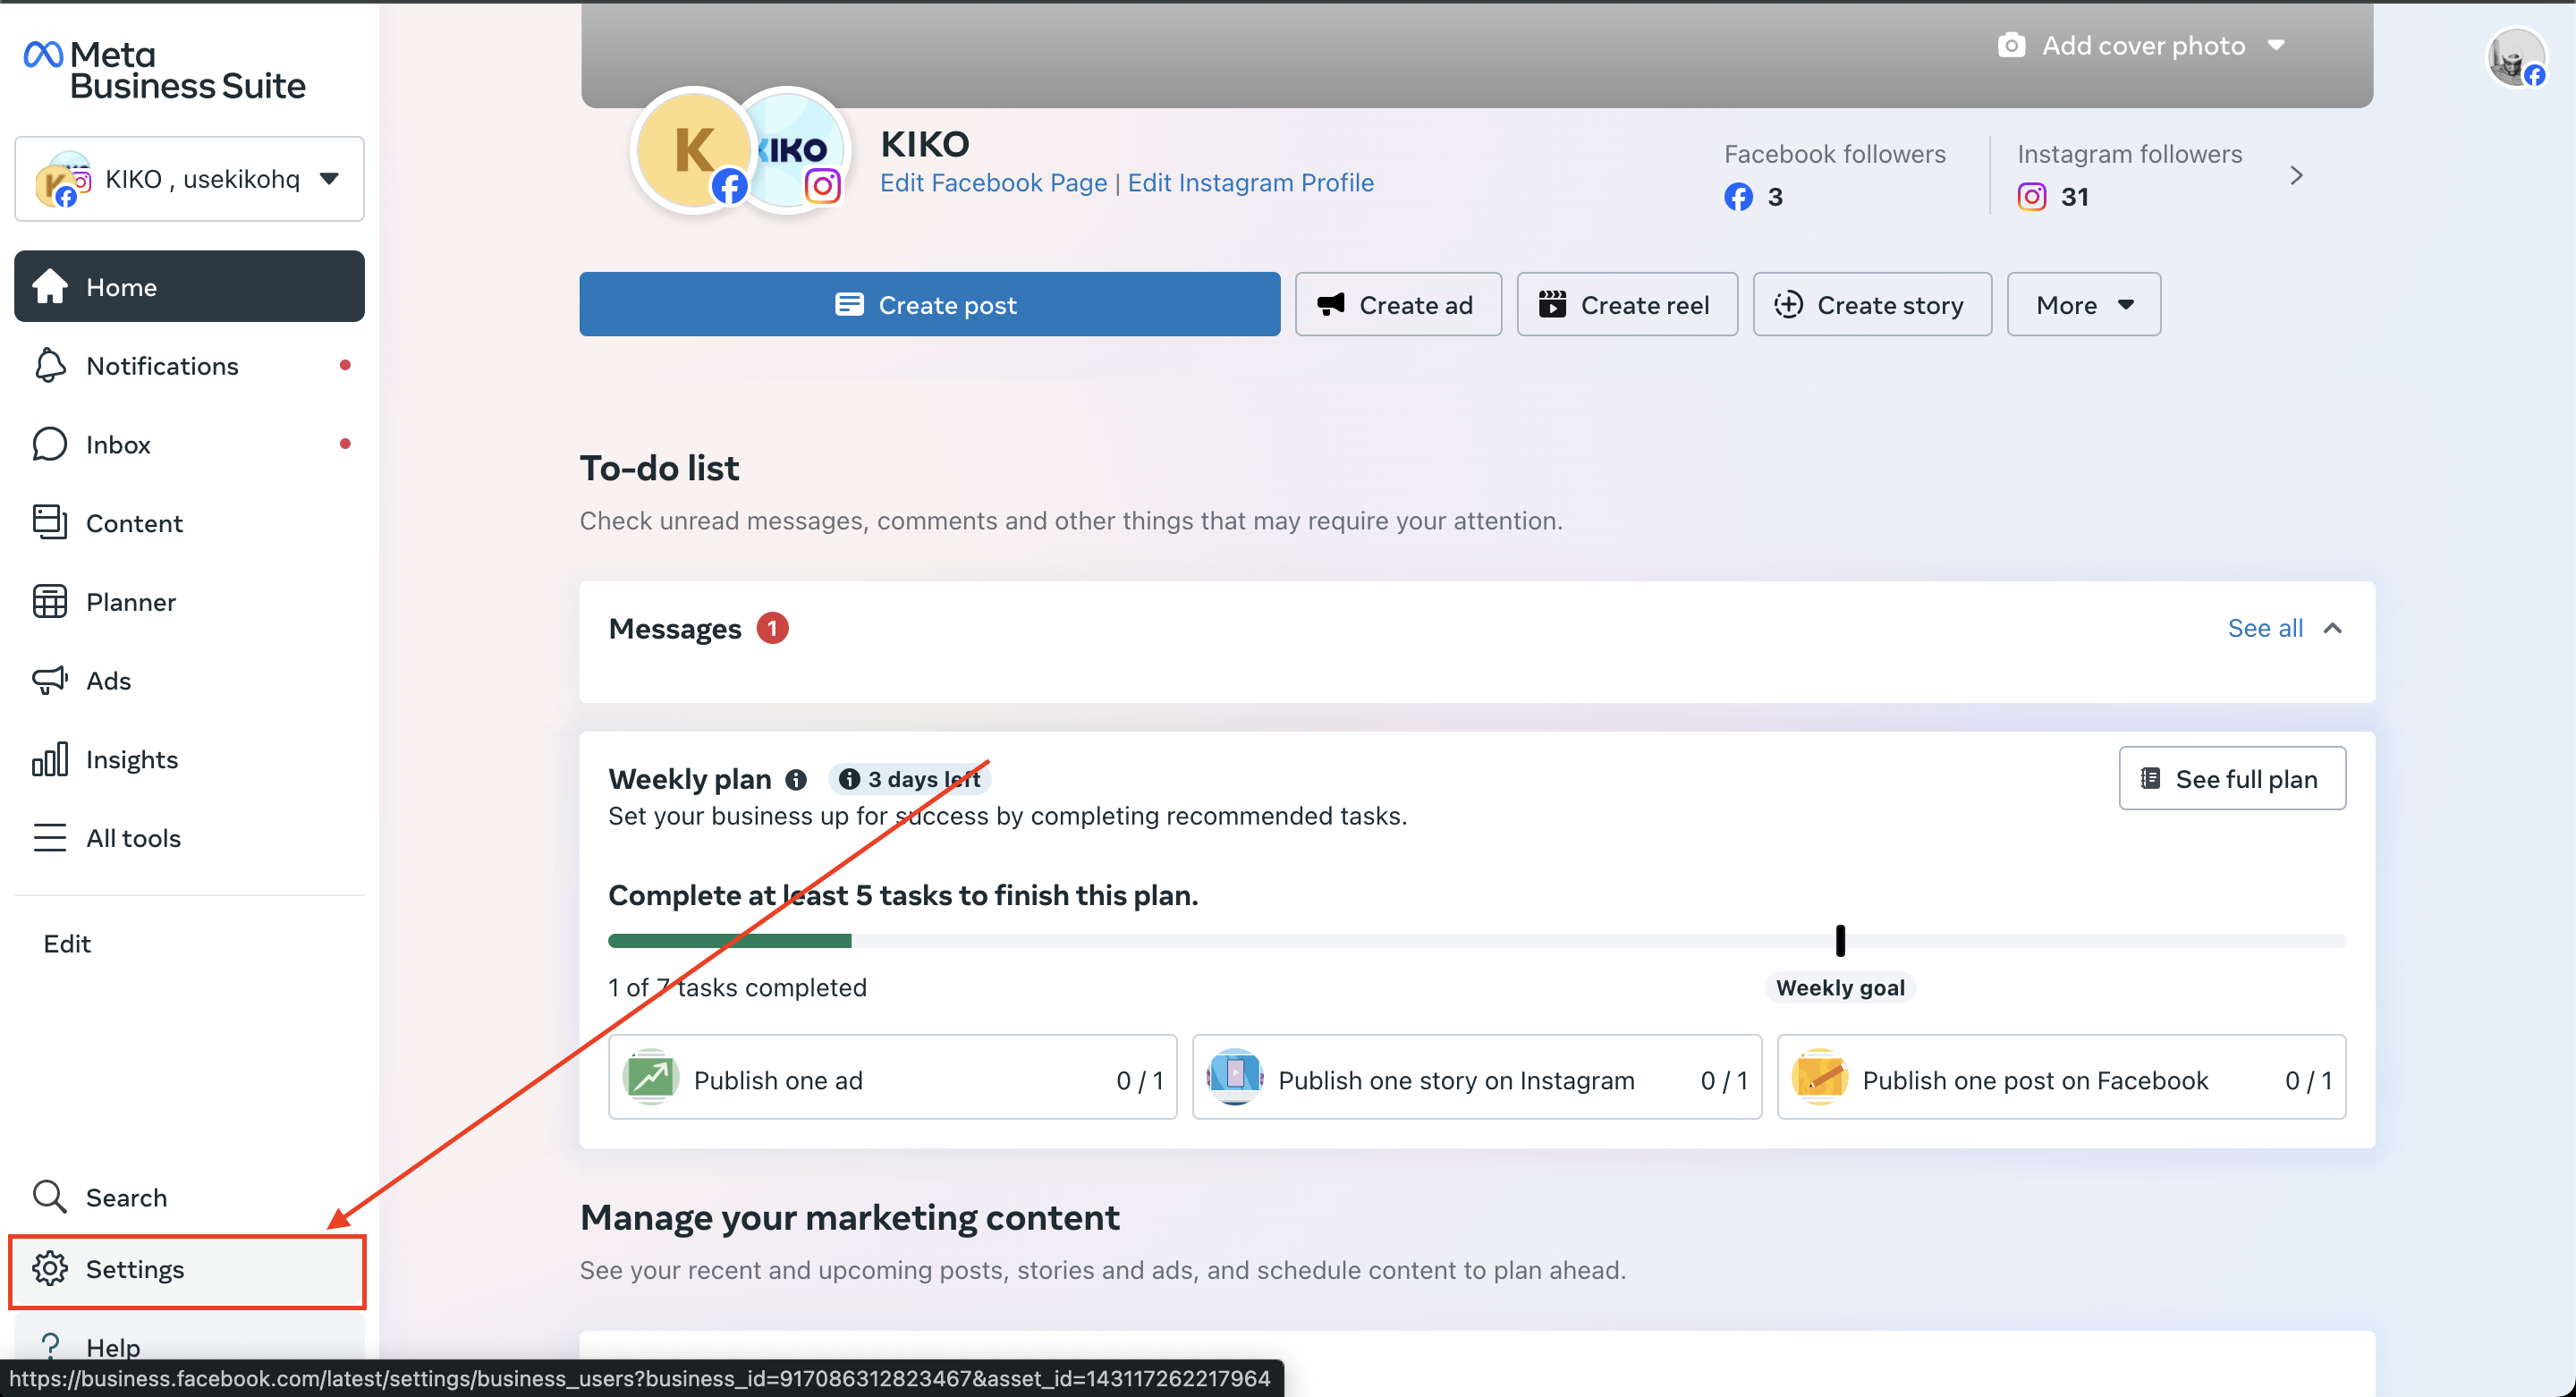
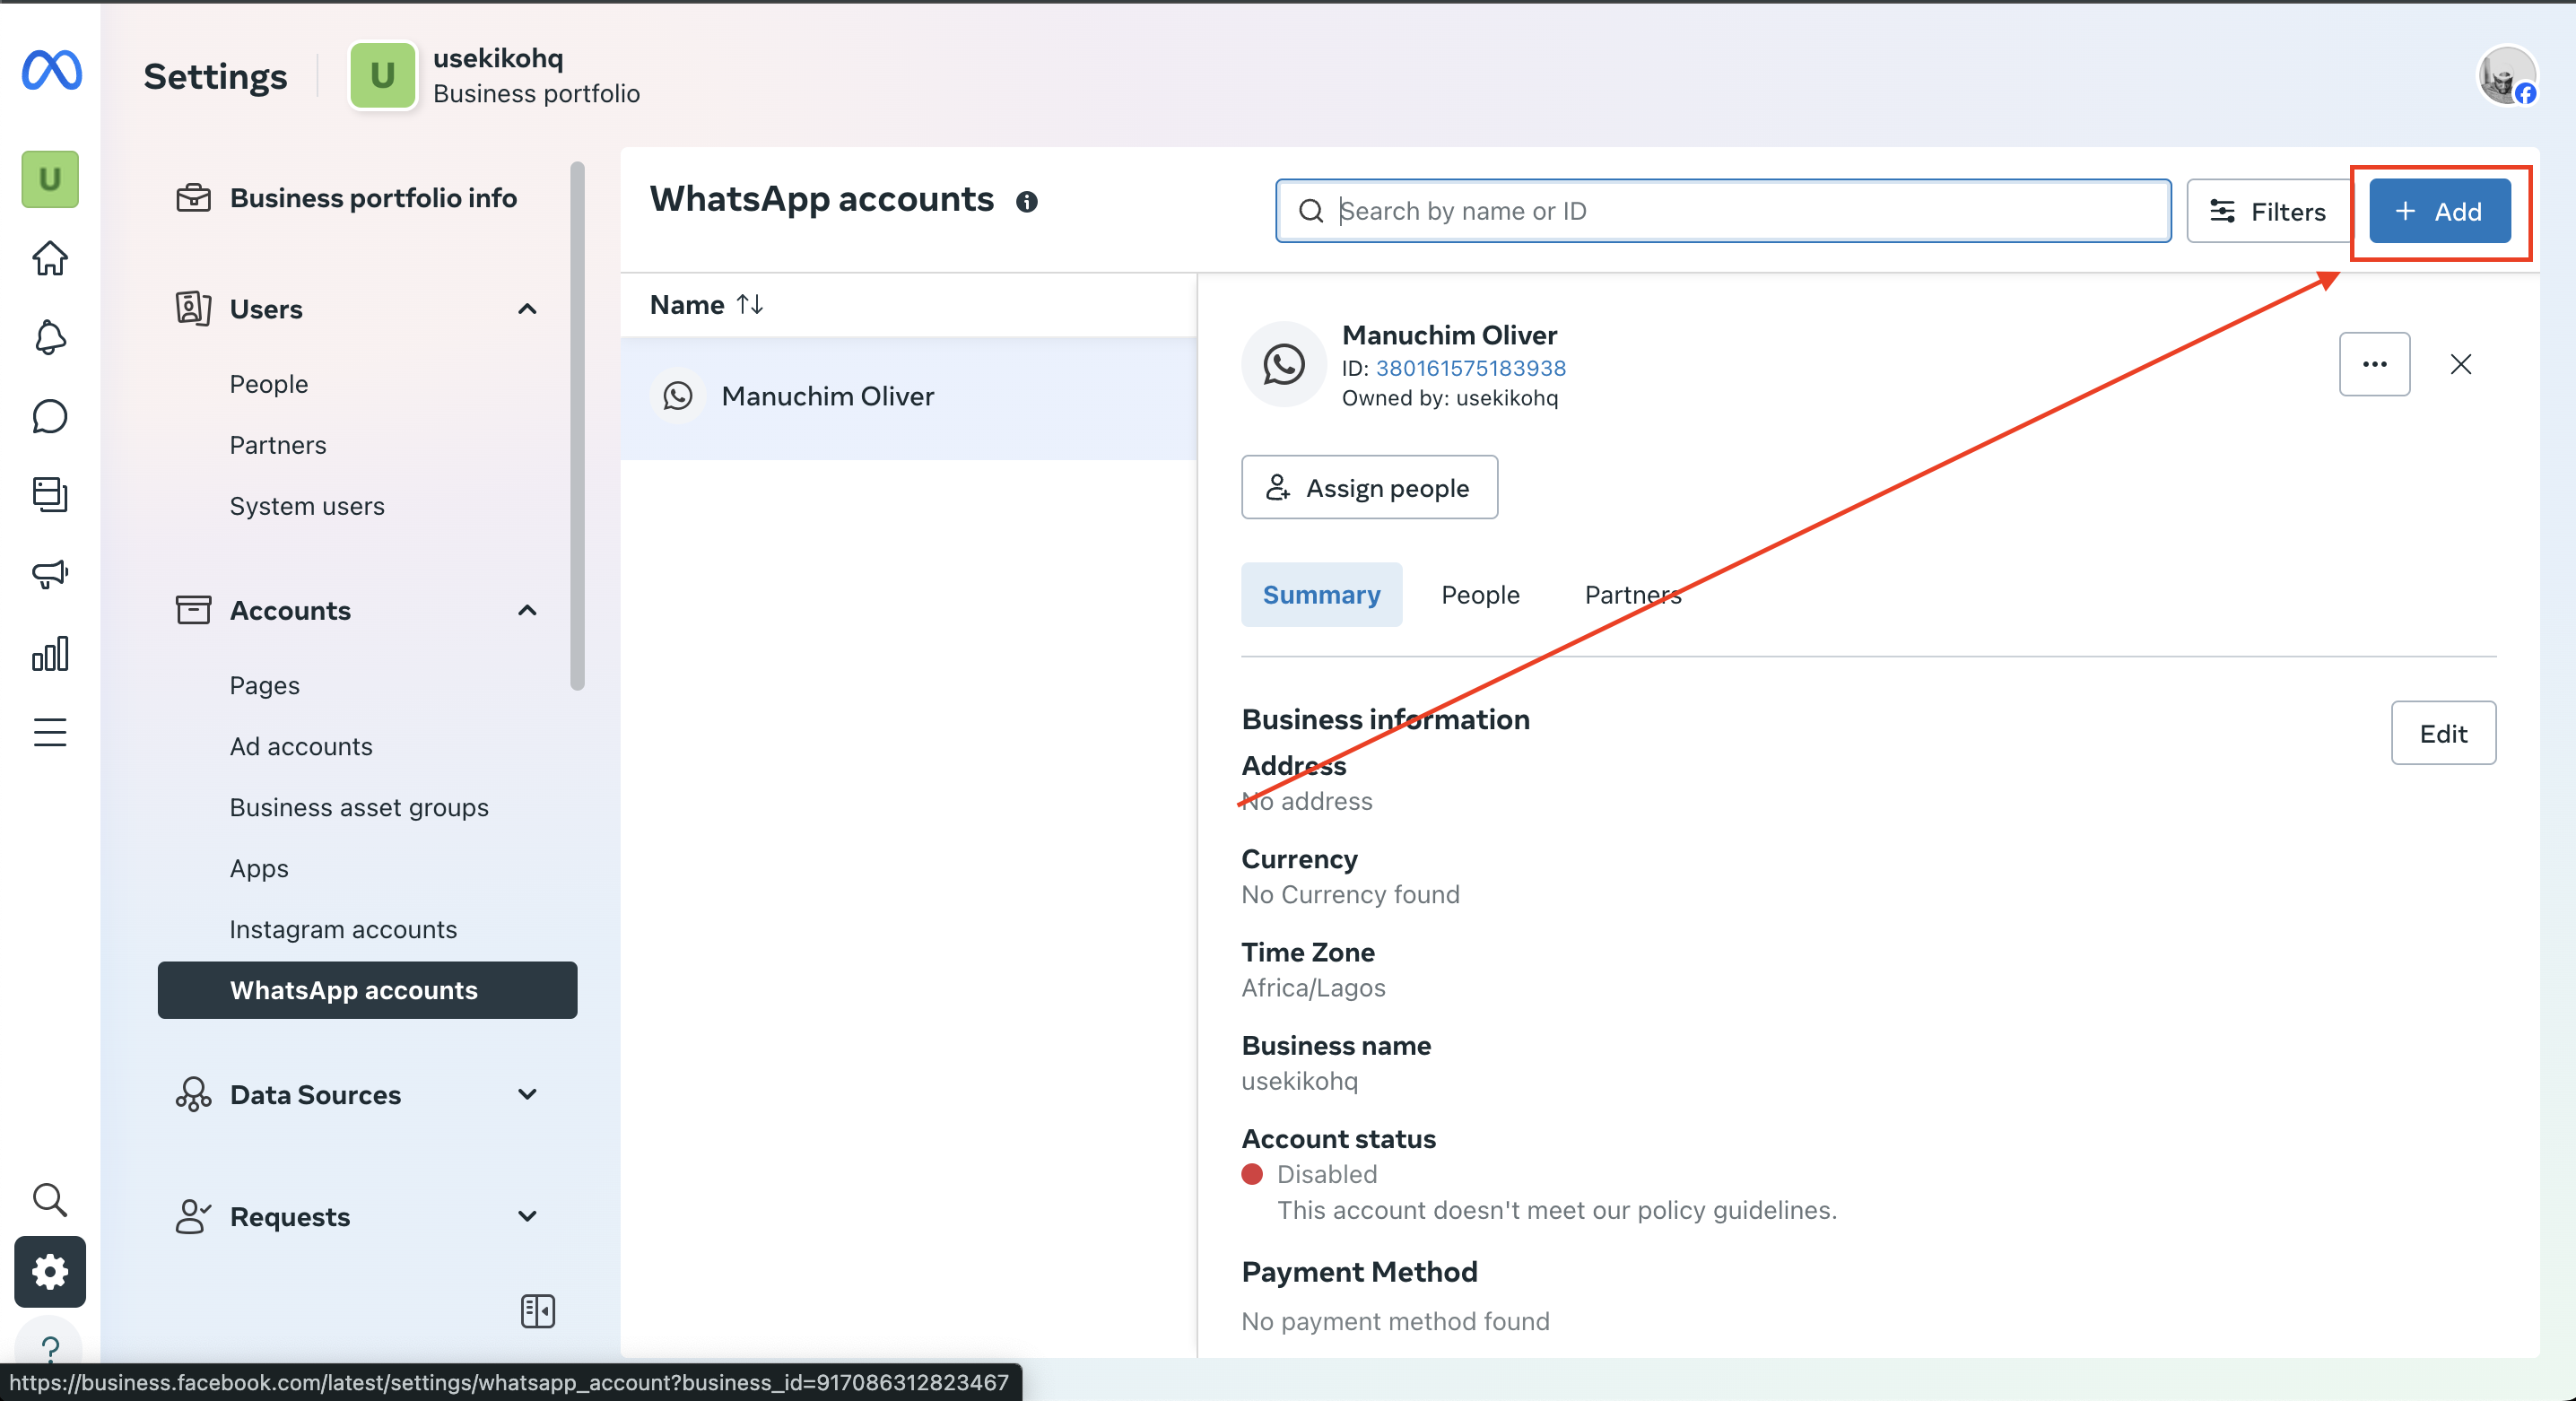
Option 2: Navigate via Settings
- Click on Settings from the left-side menu.
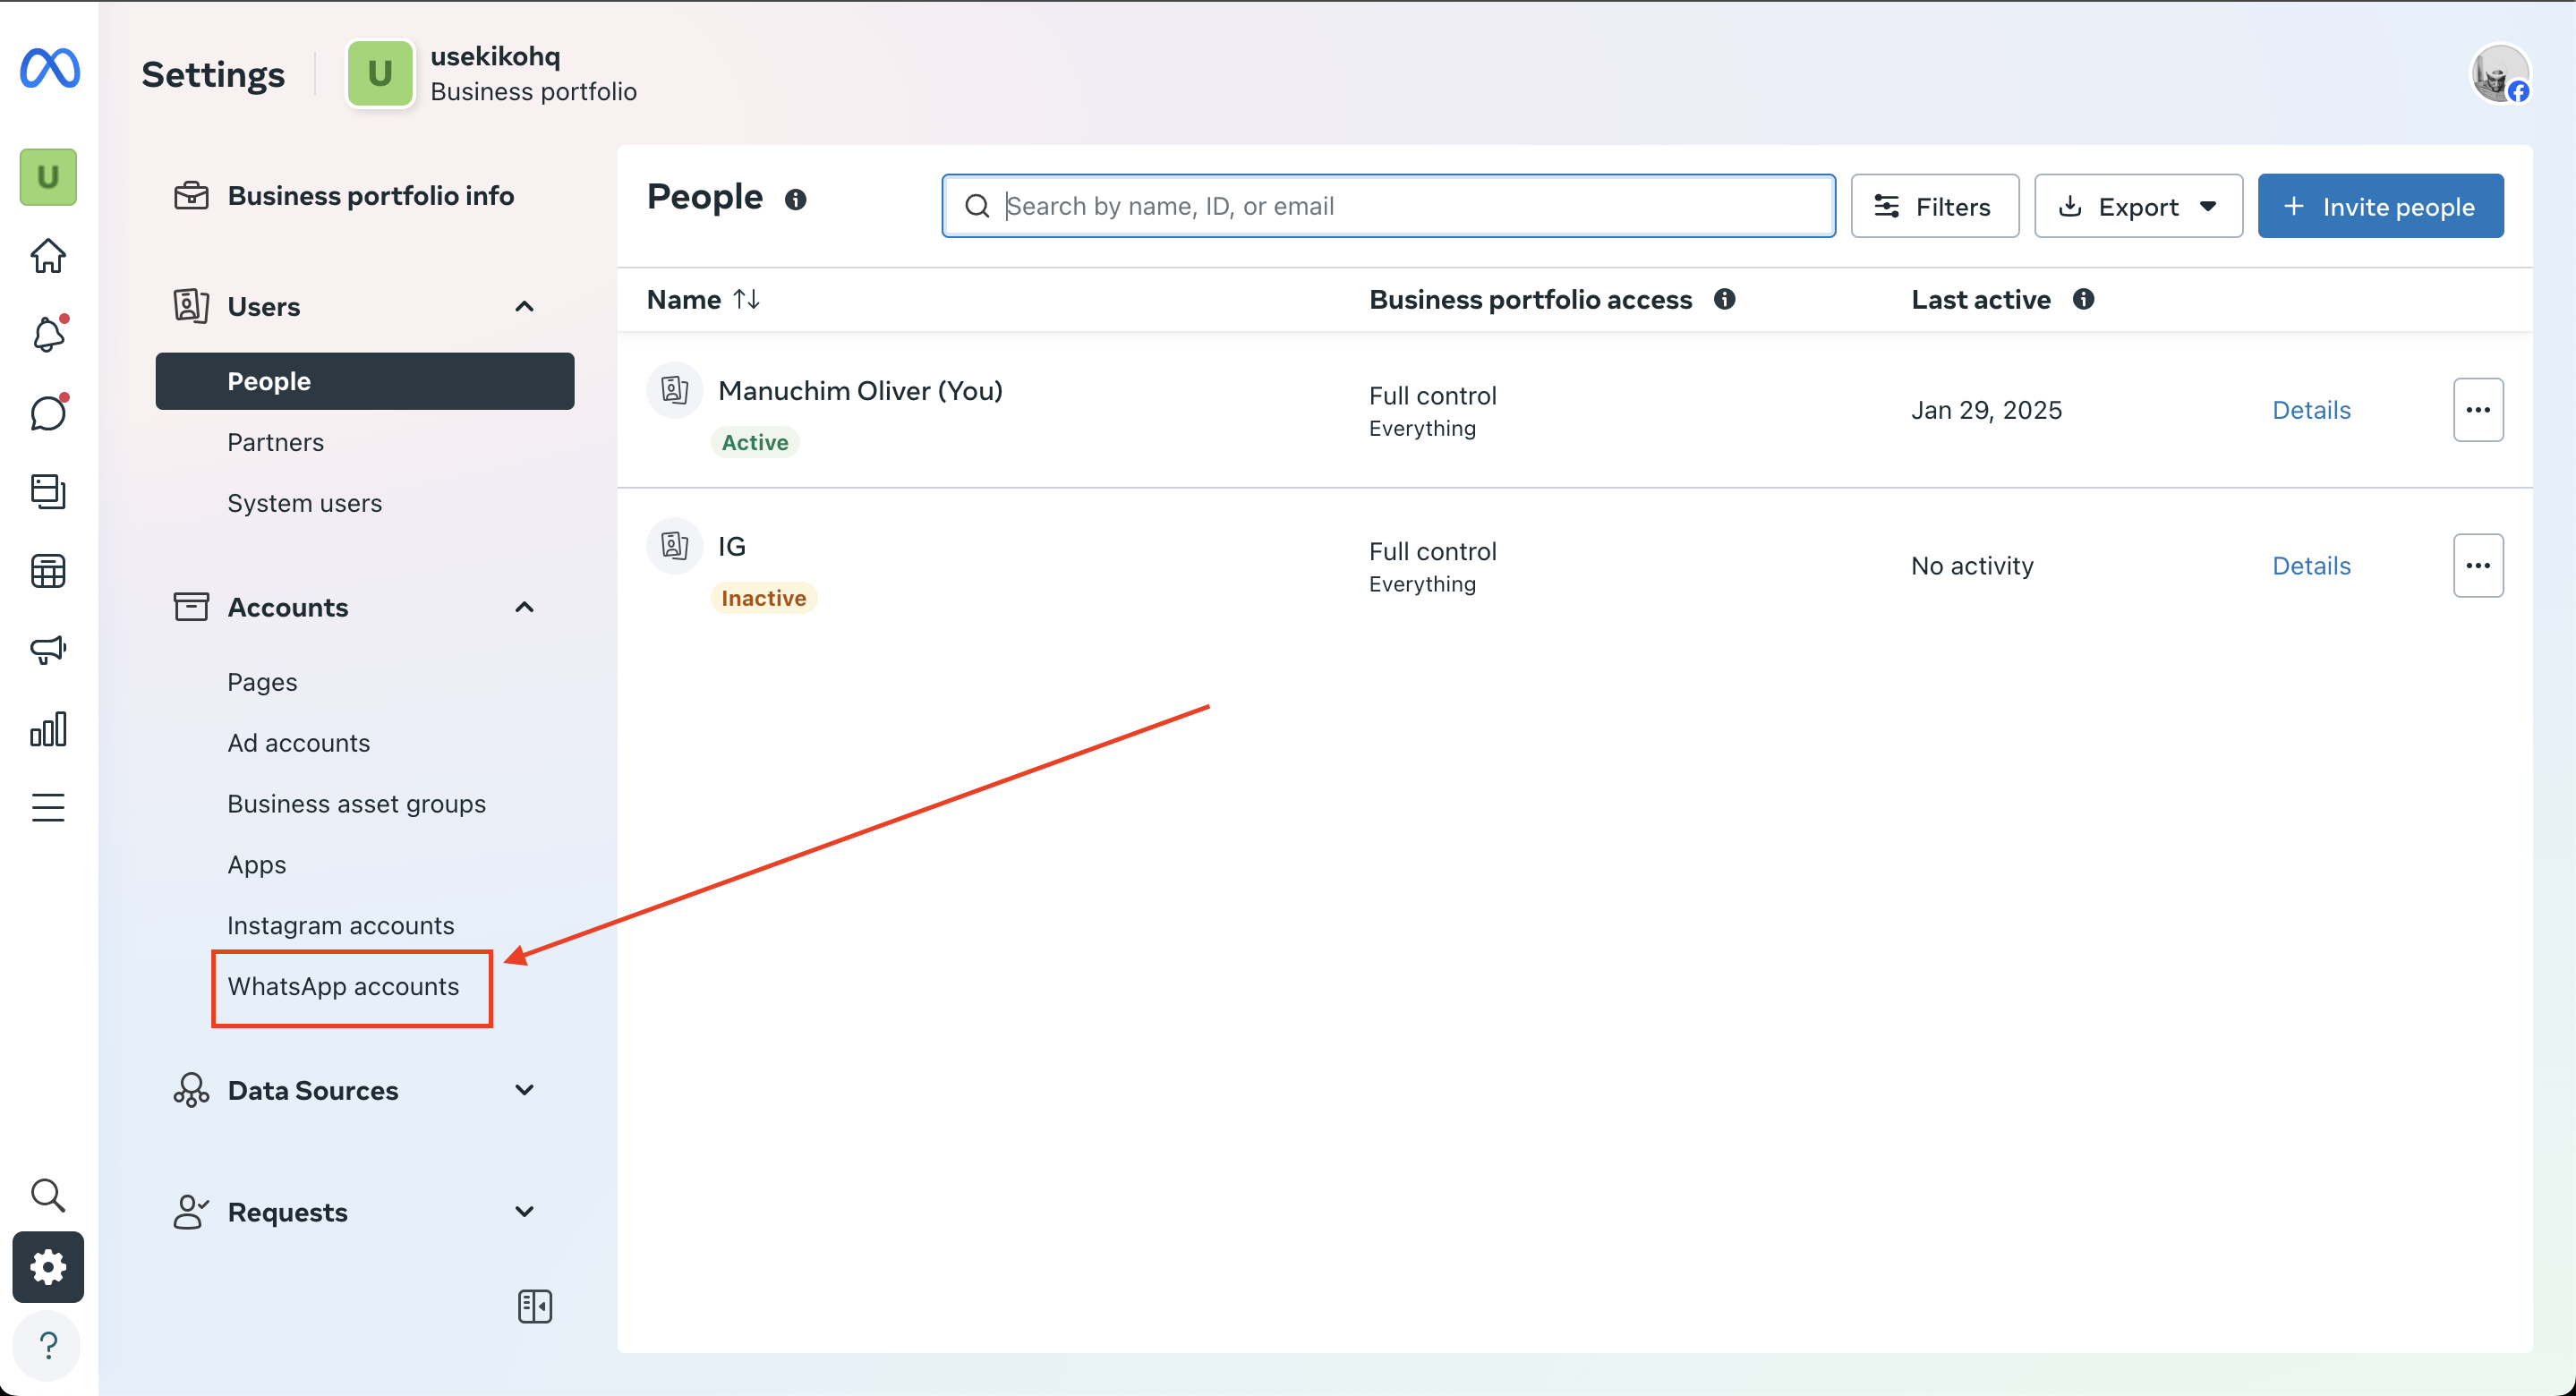
- In the page that follows, click on WhatsApp Accounts on the left-side menu.
Step 3: Adding WhatsApp Account
- Wait for the WhatsApp Account settings page to load.
- If no WhatsApp account is linked, a message saying “No WhatsApp account added” will appear.
- Click the Add button to begin the linking process.
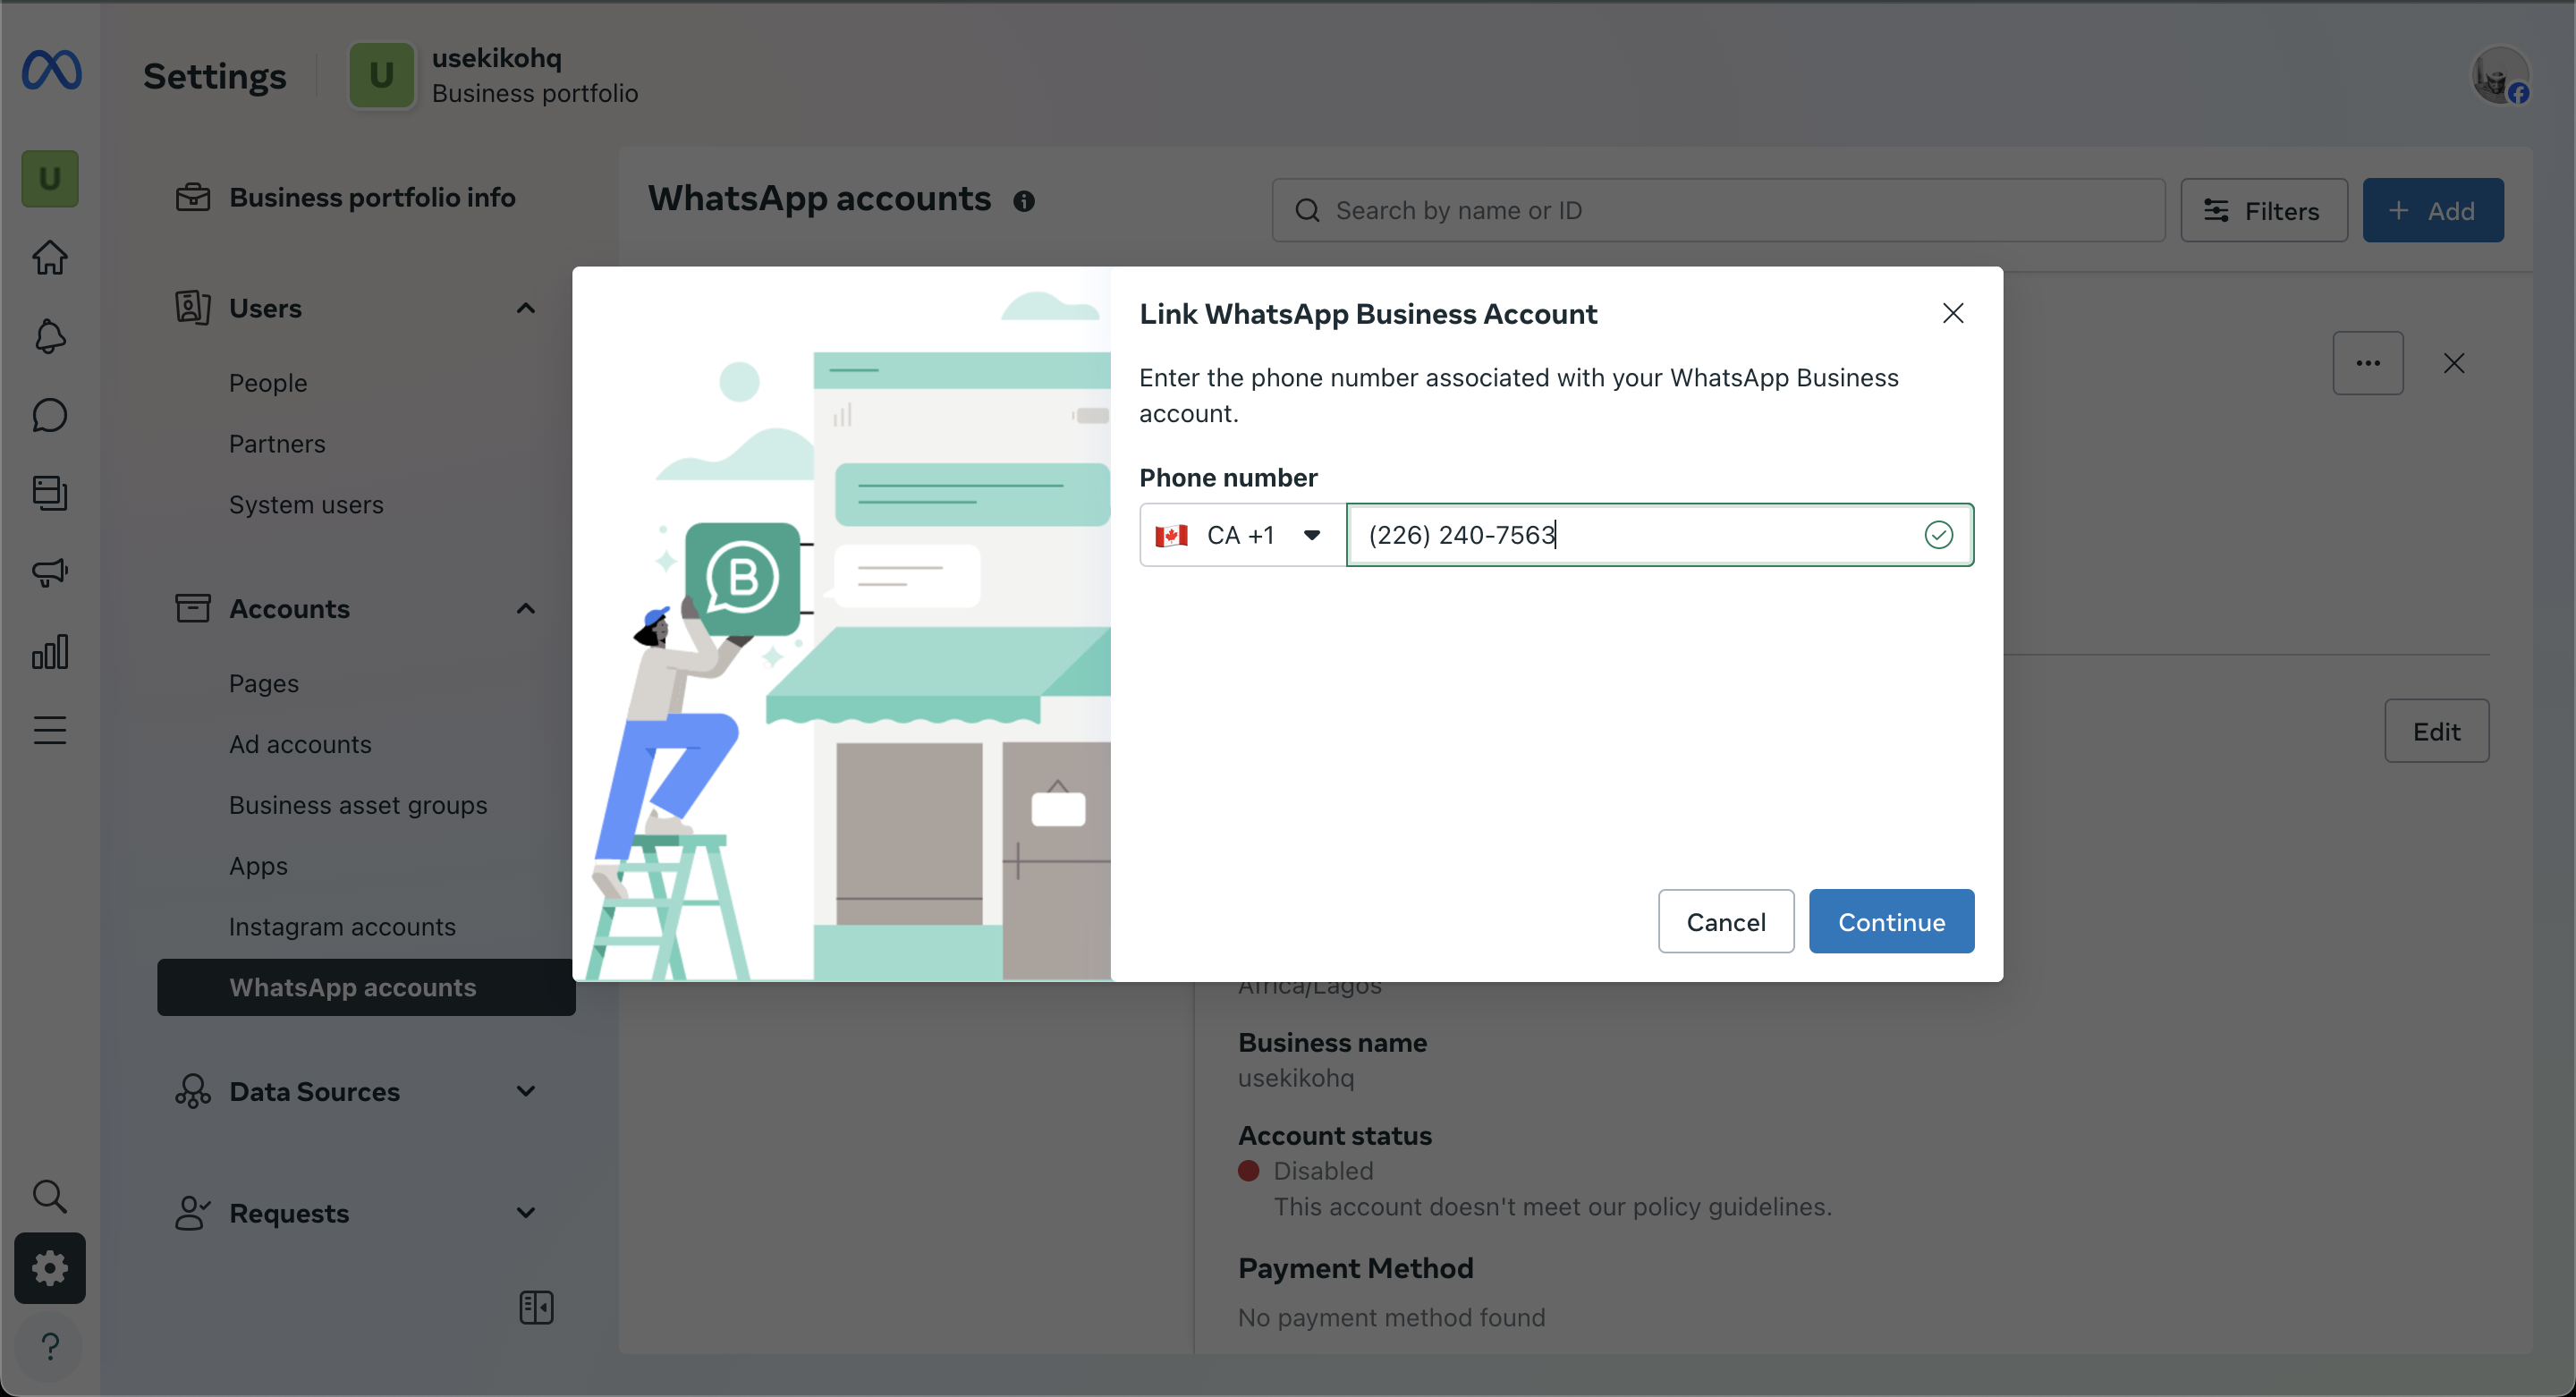
Step 4: Verifying WhatsApp Account
- A prompt will ask for your WhatsApp Business phone number.
- Ensure you select the correct country code before entering the number.
- Example: For Nigeria, select +234 before entering your phone number.
- Click Continue.
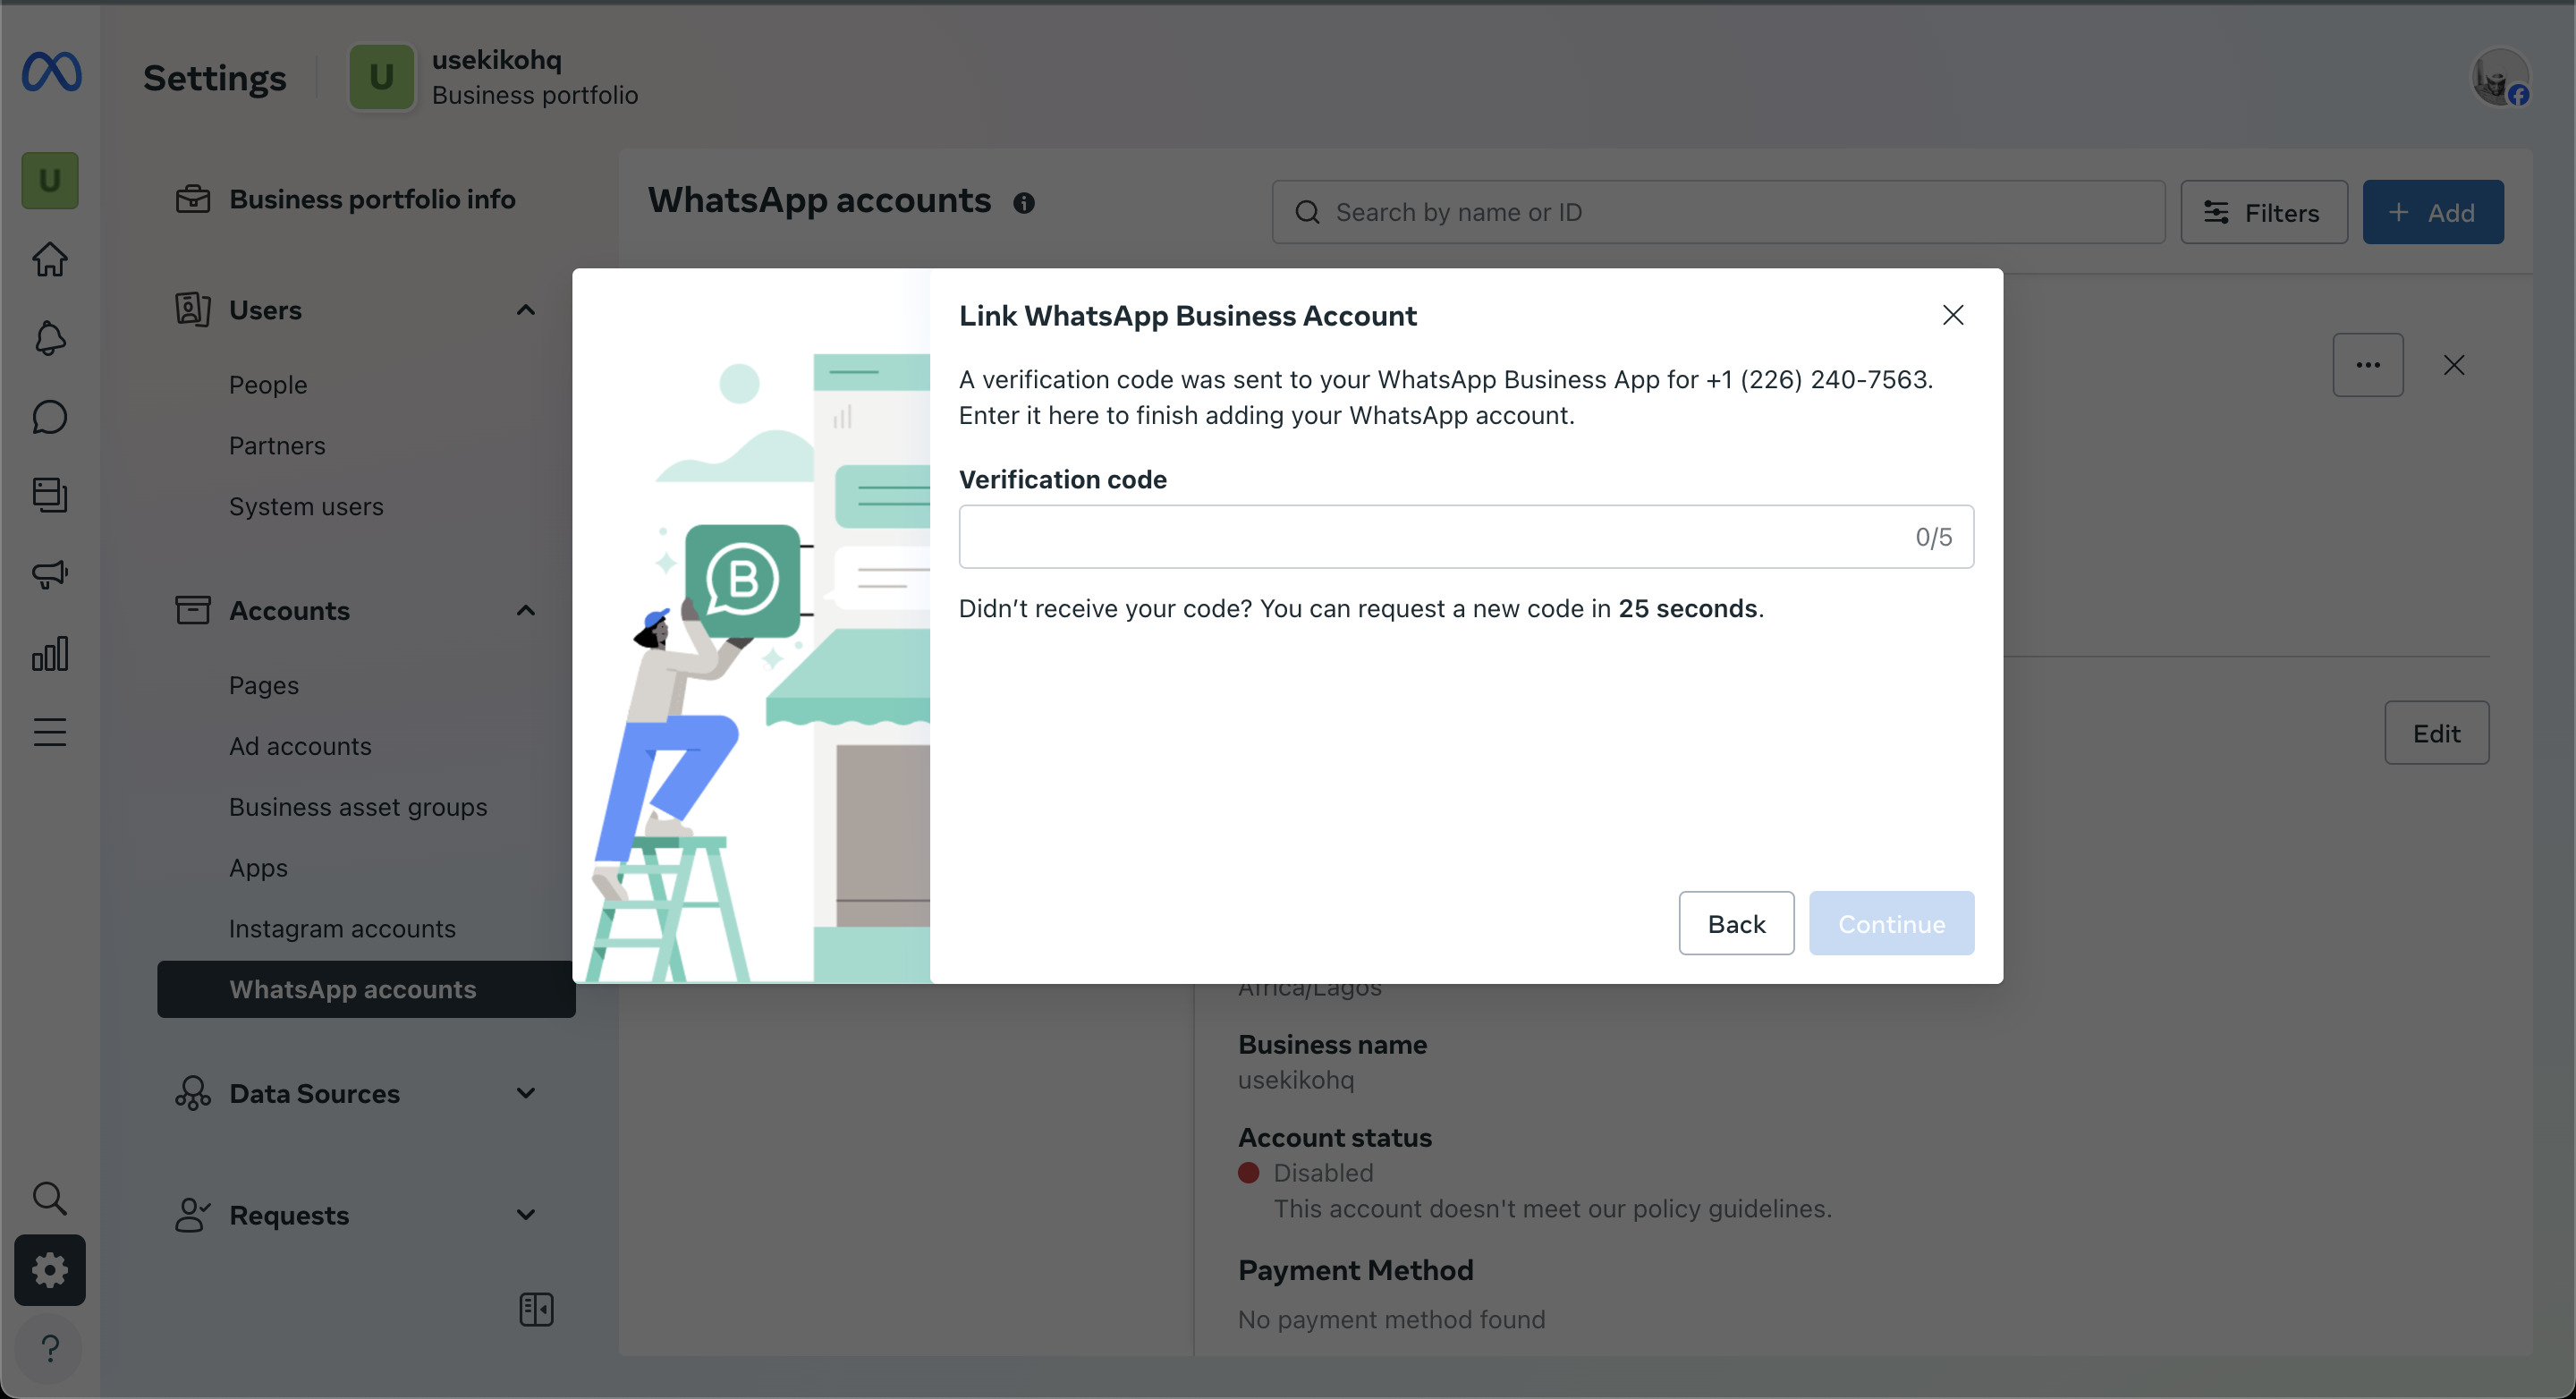
- Wait for the page to load. You will receive a verification code via WhatsApp.
- Enter the 6-digit verification code in the designated field.
- Wait for the verification process to complete.
Step 5: Confirmation and Functionality
- After successful verification, the WhatsApp Business account will be added to Meta Business Suite.
- Navigate back to Inbox.
- WhatsApp messages should now appear alongside messages from Messenger, Instagram, and Facebook comments.
- If messages do not appear immediately, allow some time for synchronization.
- Once integrated, you can send, receive, and manage WhatsApp Business messages directly within the Meta Business Suite inbox.
Troubleshooting
No verification code received?
- Ensure the correct country code and phone number were entered.
- Check for network connectivity issues.
- Try requesting the code again after a few minutes.
WhatsApp messages not appearing in Inbox?
- Refresh the page.
- Log out and log back into Meta Business Suite.
- Wait a few minutes for messages to sync.
Unable to find WhatsApp in Meta Business Suite?
- Ensure you are using the correct business account.
- Try searching for “WhatsApp Account” instead of just “WhatsApp”.
Summary
This guide outlines the complete process of linking a WhatsApp Business account to Meta Business Suite, allowing businesses to manage customer communications efficiently. By utilizing the search function, linking the account, and verifying the phone number, businesses can seamlessly integrate WhatsApp messaging into their customer support workflow. Following these steps ensures smooth setup and functionality within the Meta Business Suite Inbox. For further assistance, visit the Meta Business Help Center.Integrating an Existing WhatsApp Business Account to Breezeflow
Breezeflow provides a centralized platform for managing communications across Email and WhatsApp. This guide details the step-by-step process to integrate an existing WhatsApp Business account into Breezeflow, enabling businesses to streamline multiple customer interactions in a single inbox.Prerequisites
Before proceeding, ensure you have the following:- An existing WhatsApp Business account. If you do not have one, create a WhatsApp Business account using the WhatsApp Business App.
- Admin access to Meta Business Suite for your business account.
- A stable internet connection.
Step 1: Accessing the WhatsApp Settings Screen
- Open a web browser and go to Breezeflow.
- Log in with your Breezeflow credentials.
- On the left-side menu, locate and click Settings.
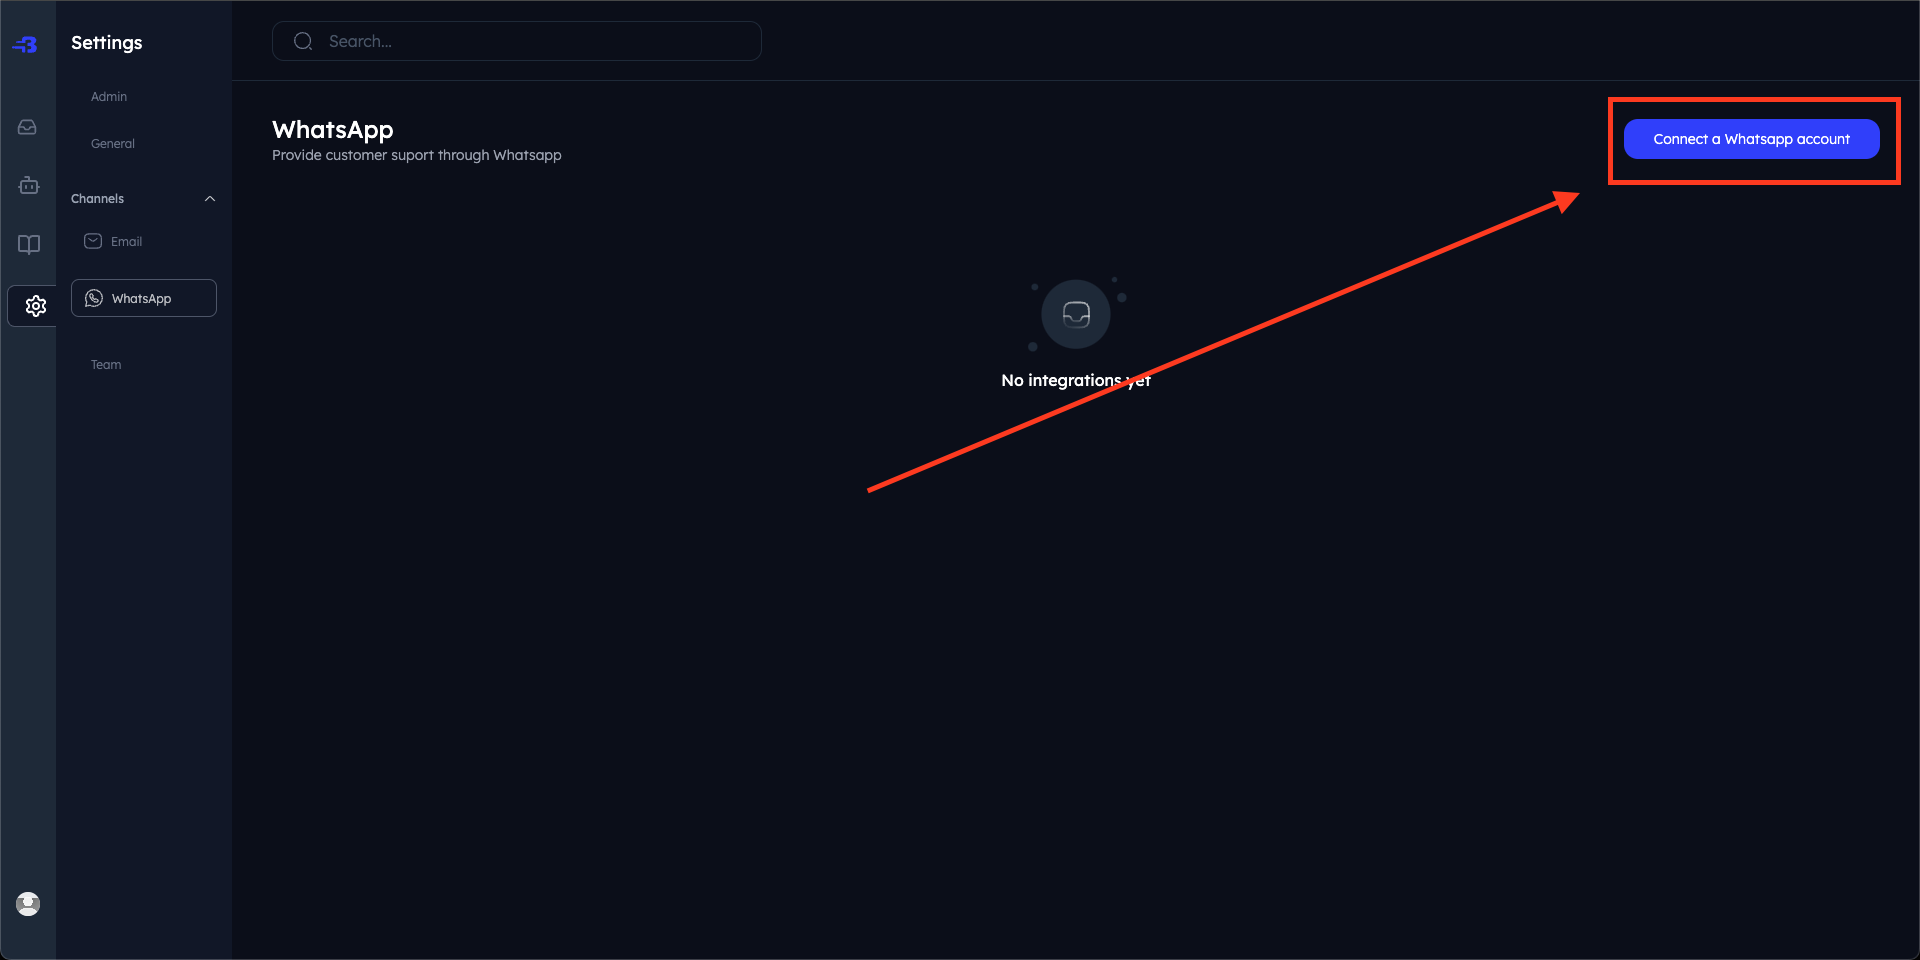
- The Inbox contains settings for multiple features within the Breezeflow App, including Email, WhatsApp, Your Team, Your Company, and Your Profile.
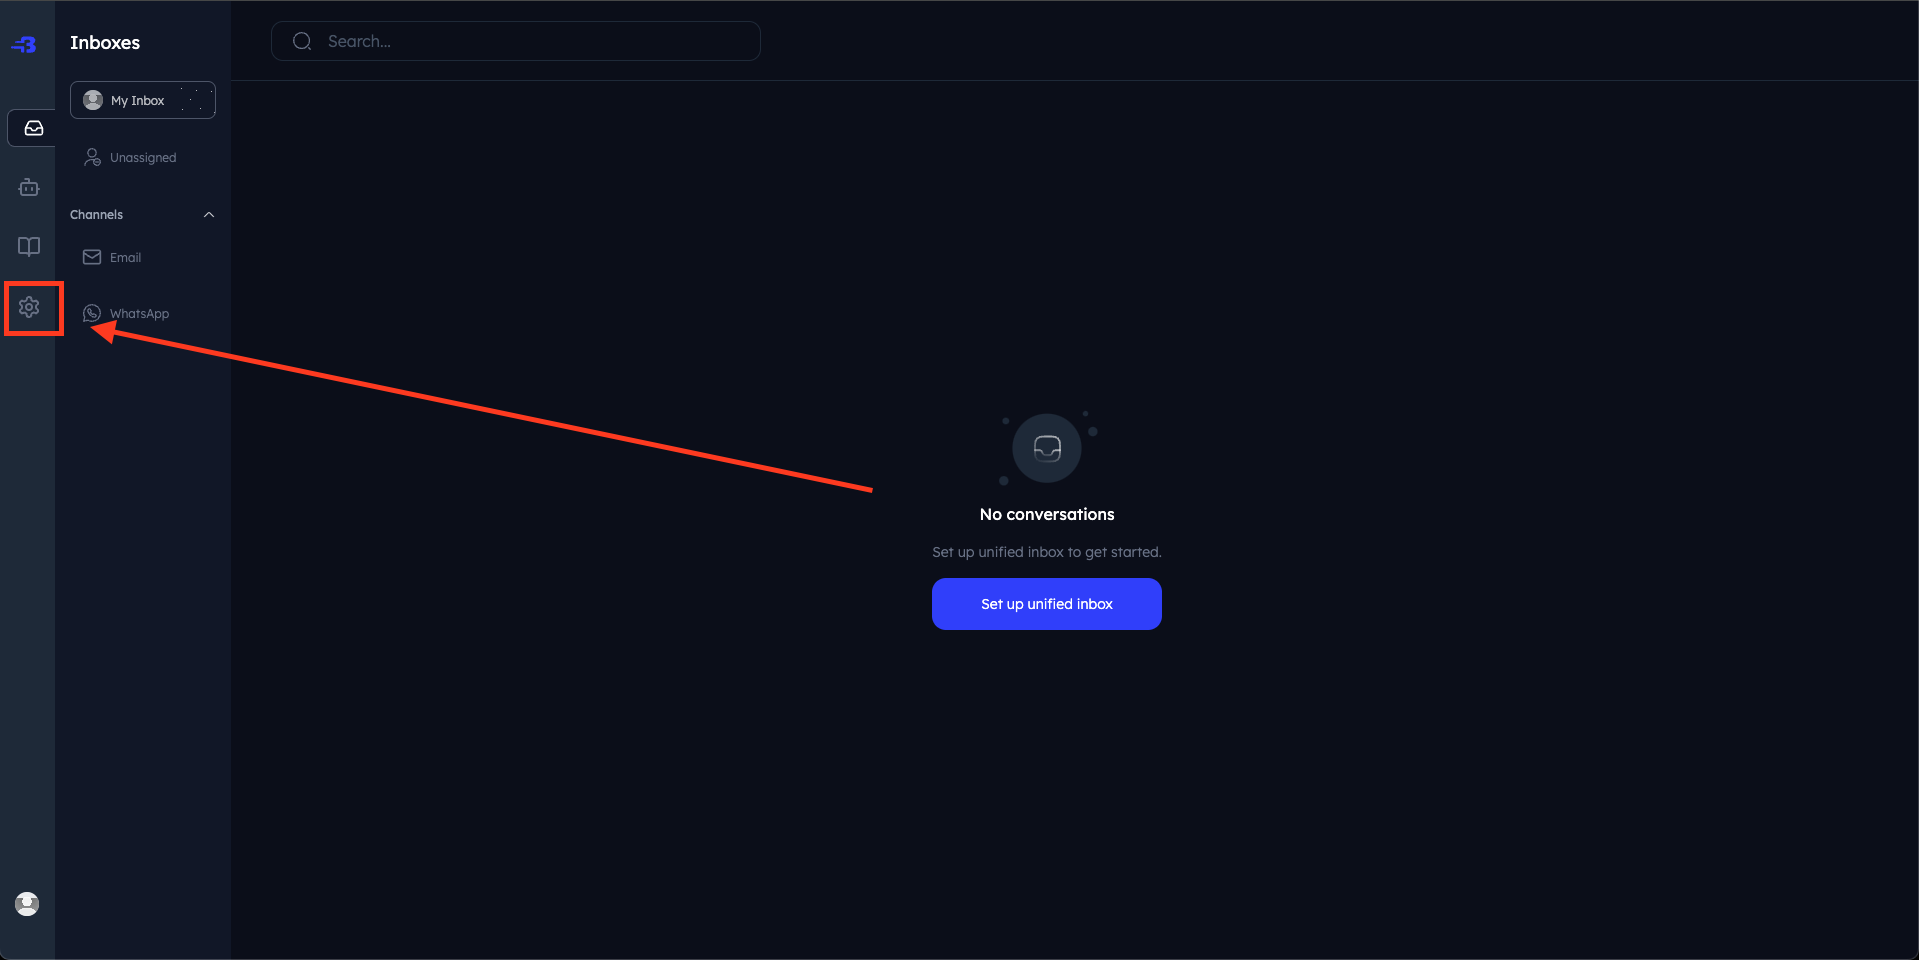

Note: WhatsApp integration options appear after initial setup
Step 2: Creating a WhatsApp Integration with Your Existing WhatsApp Business Account
-
Click on the “Connect A WhatsApp Account” button on the top-right of your screen.
-
This opens a Facebook (Meta) dialog, where you will first be authenticated.
- Sign in to your Facebook account. If you are already signed in, you can click the “Continue” button.
Step 3: Integrating Your WhatsApp Business Account
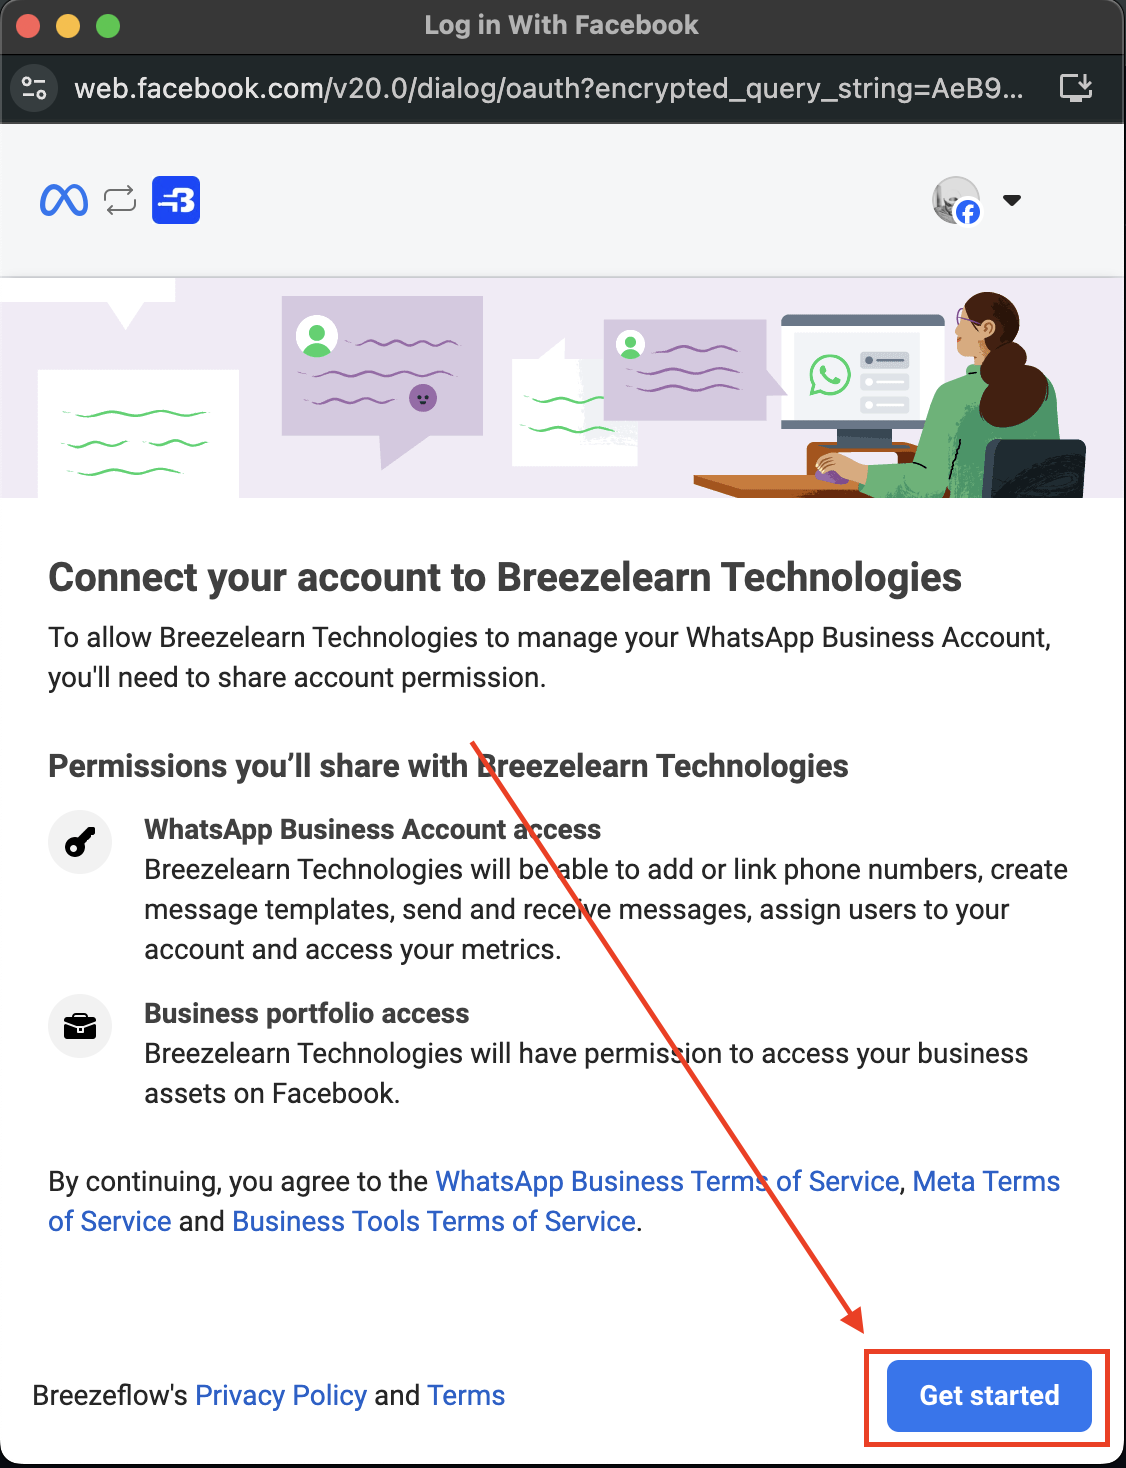
- Wait for the WhatsApp Account settings page to load.
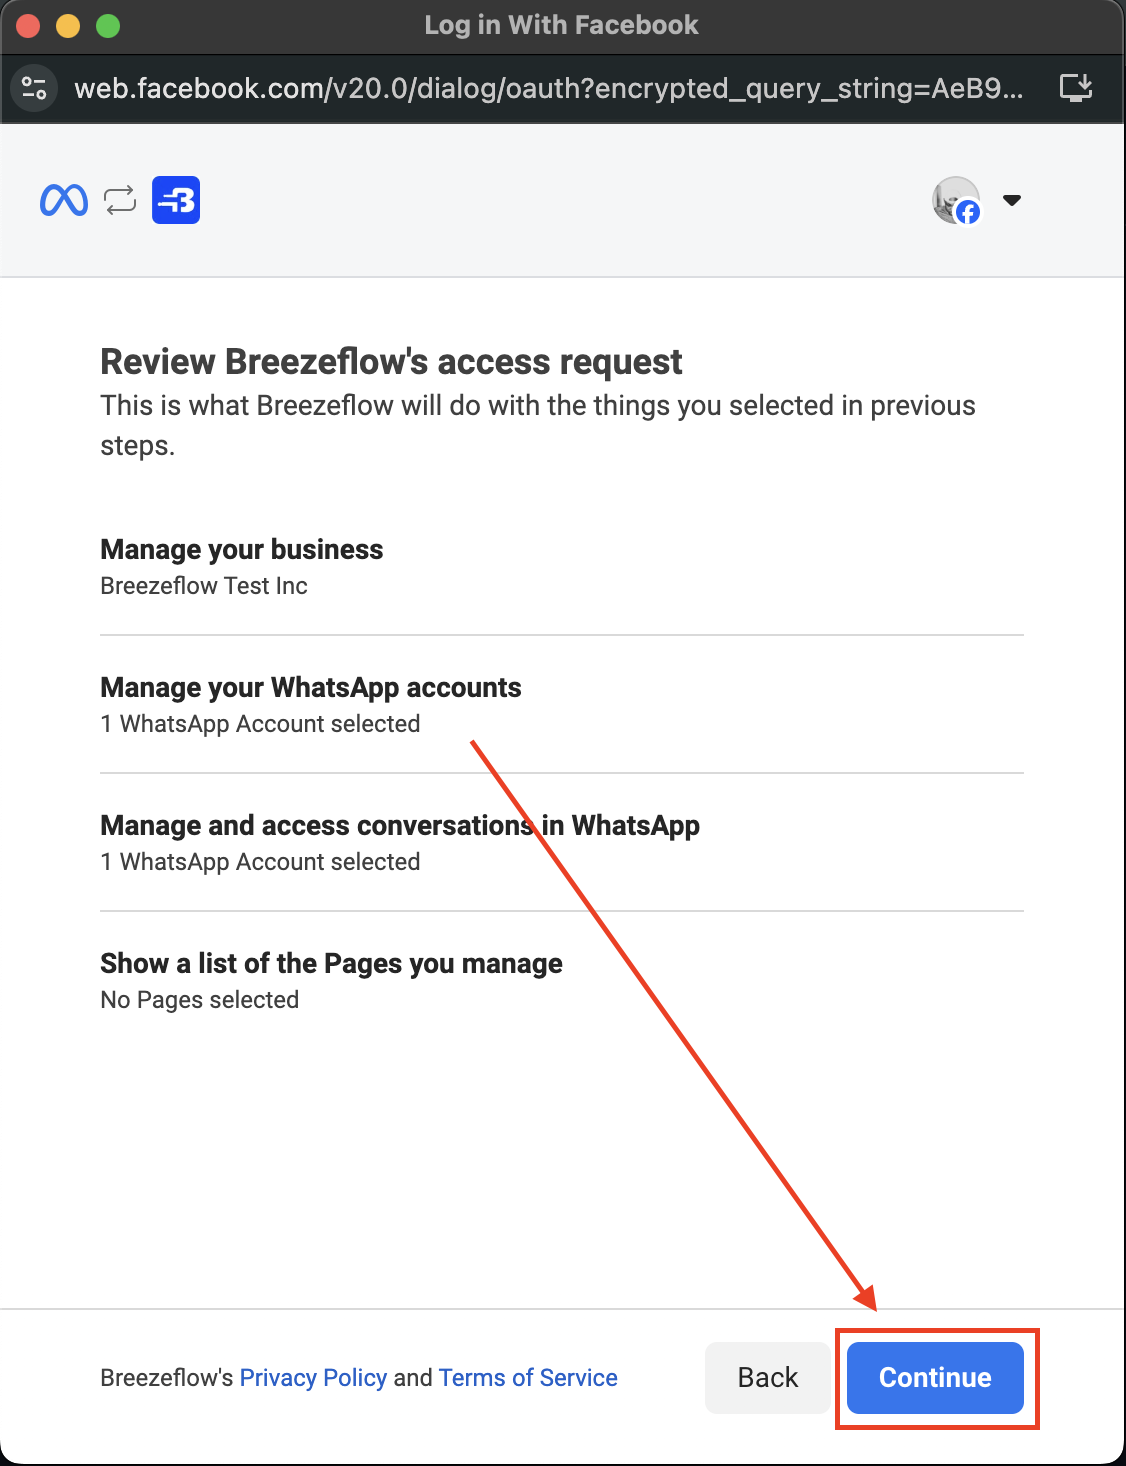
- Review the permissions you will be sharing with Breezeflow to enable seamless customer engagement.
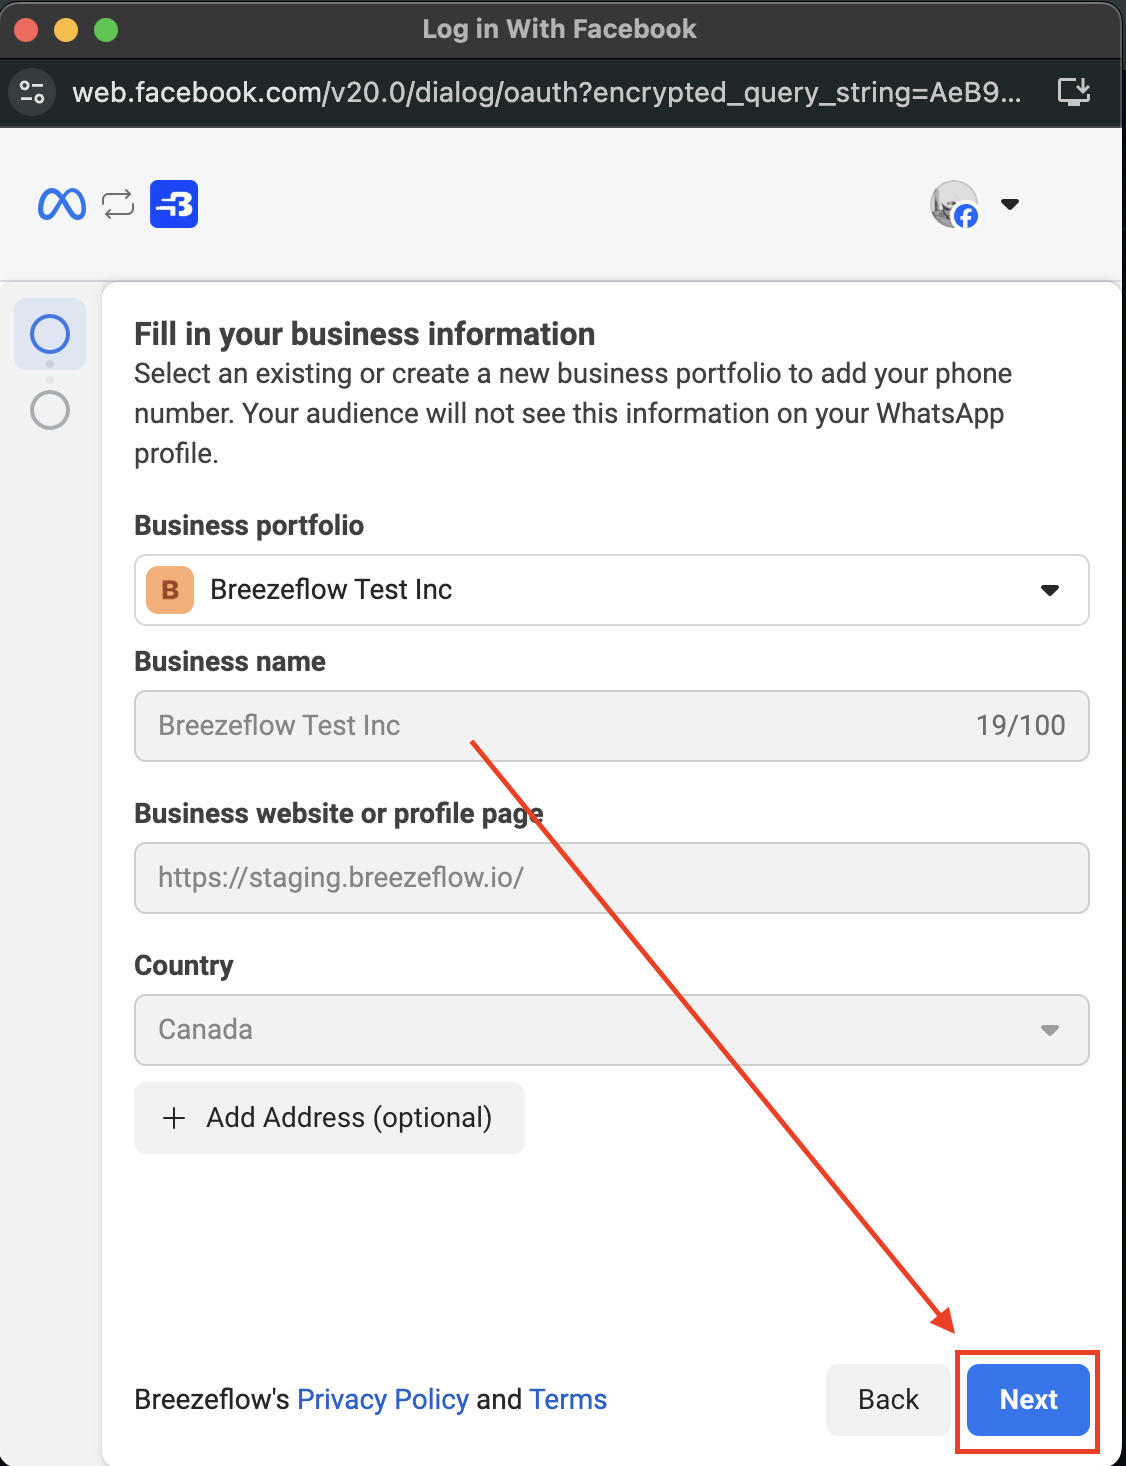
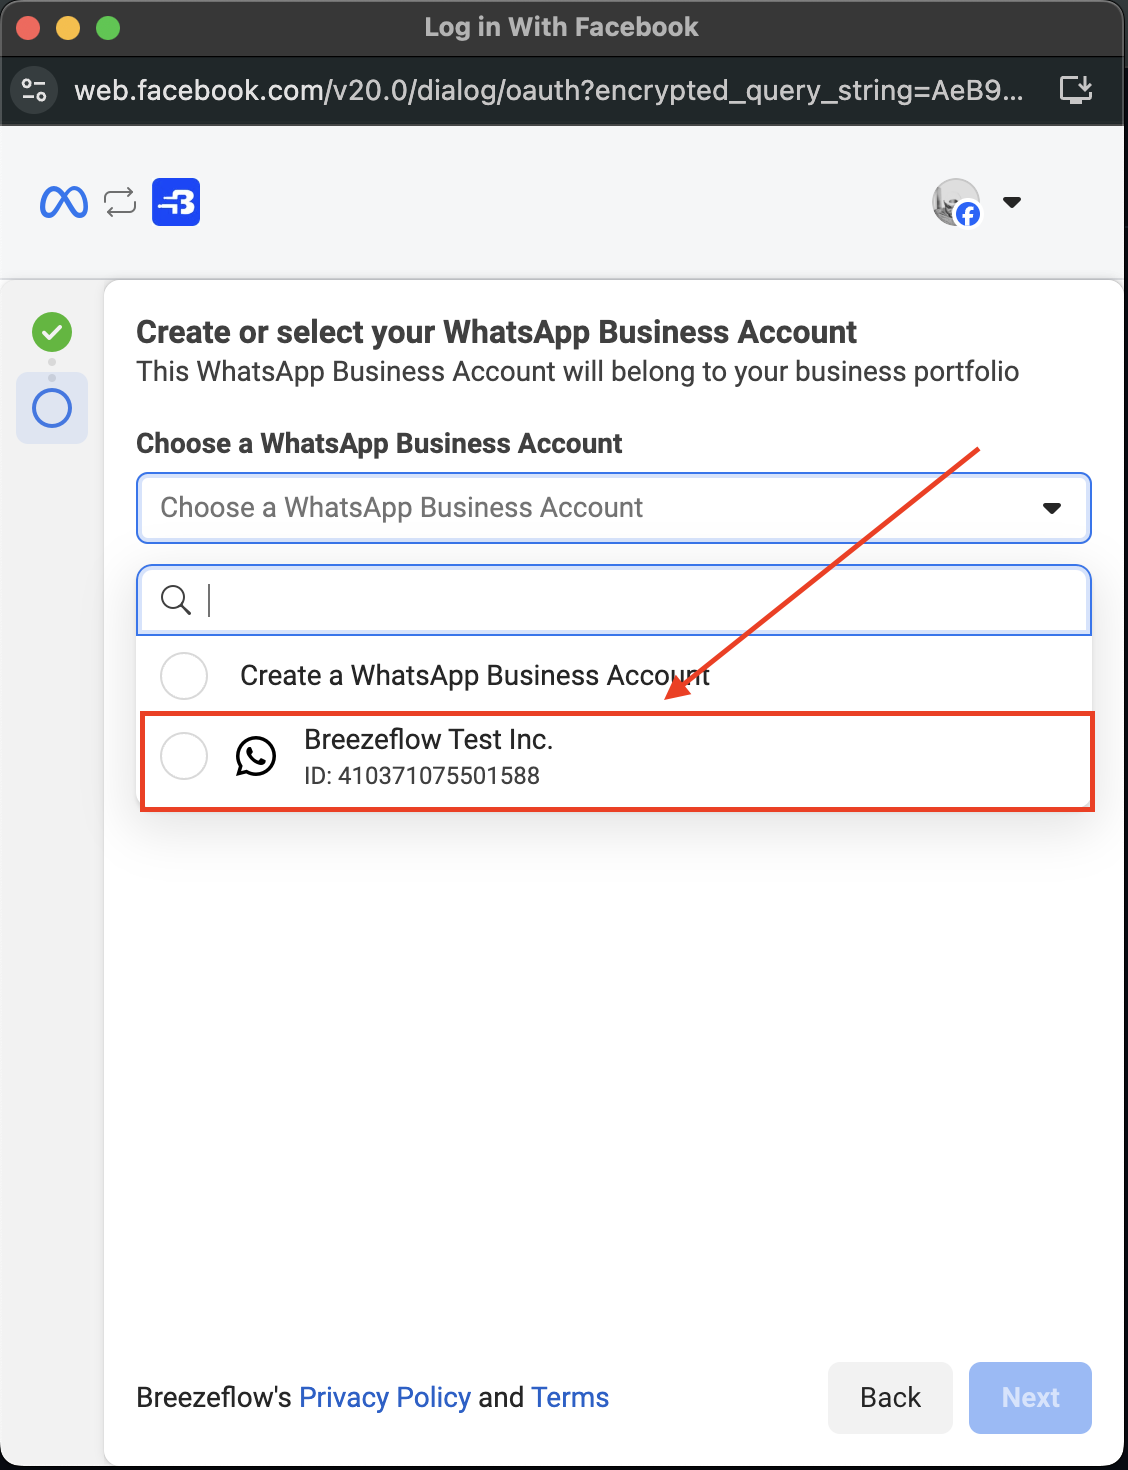
- Select your business portfolio and fill out any required information if you haven’t already.
- Select your existing verified WhatsApp Business Account(s) for integration.
-
Note: If you do not have a verified WhatsApp Business Account, you will not see any phone numbers available for selection.
-
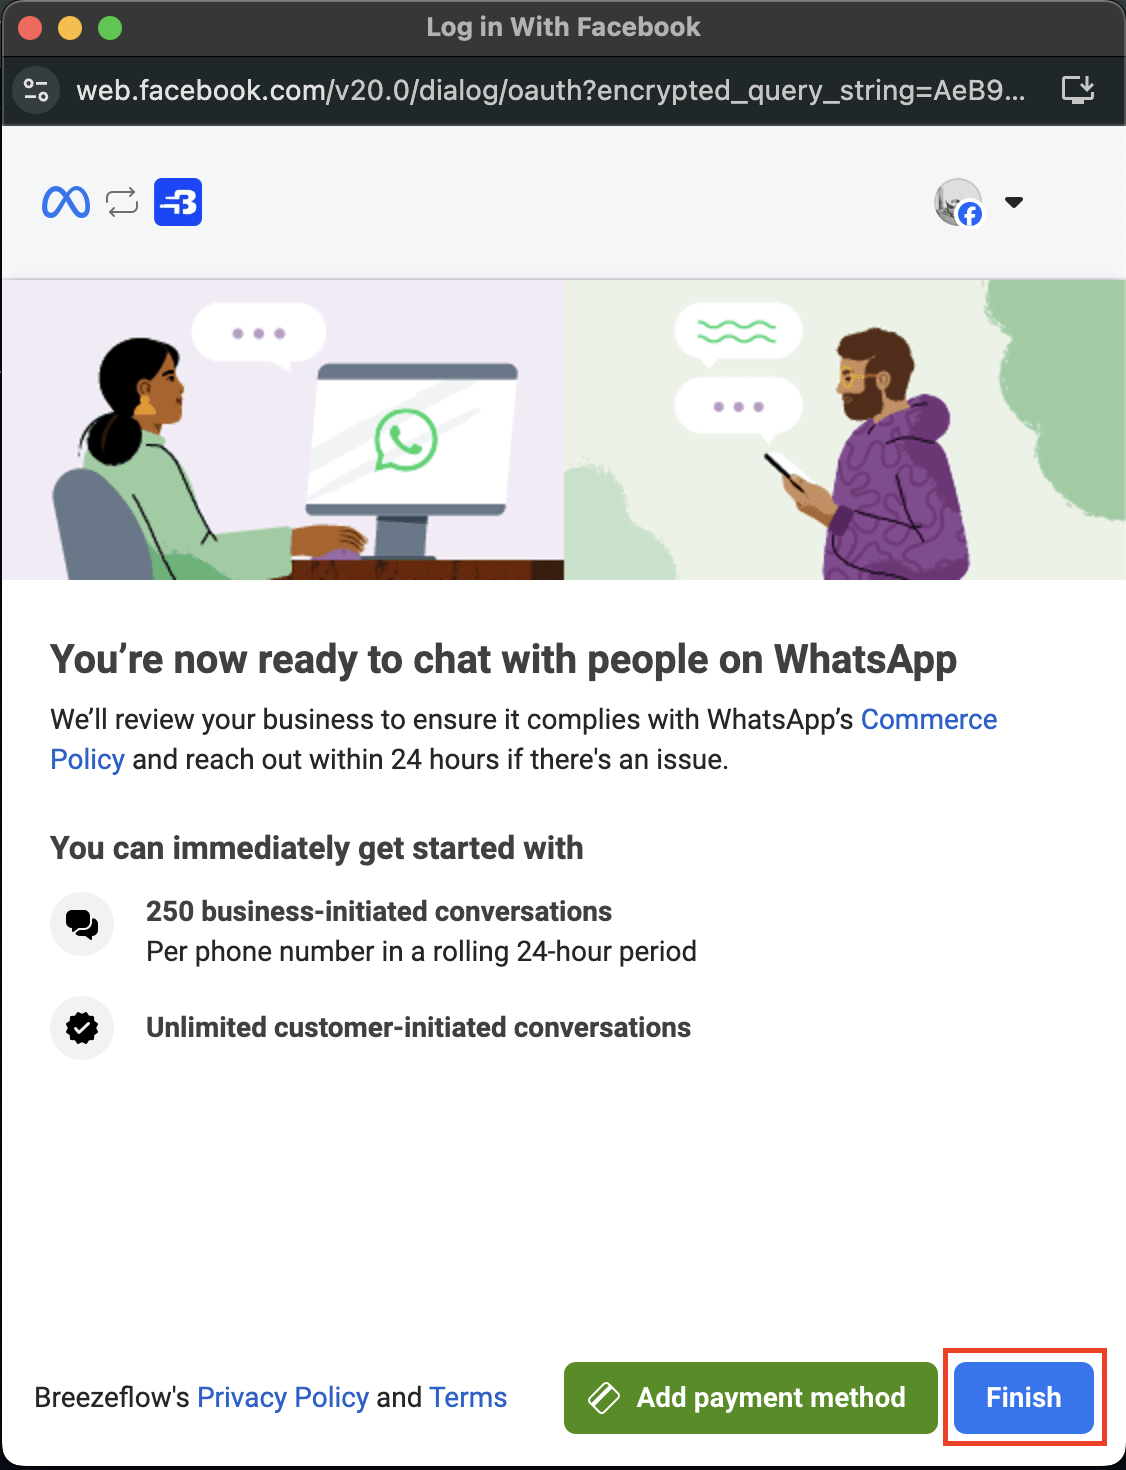
- Review the Access Request Permissions and click the “Continue” button.

Support Resources
- For Meta Business issues: Visit Meta Business Help Center
- For Breezeflow support: Access Breezeflow documentation or contact support team